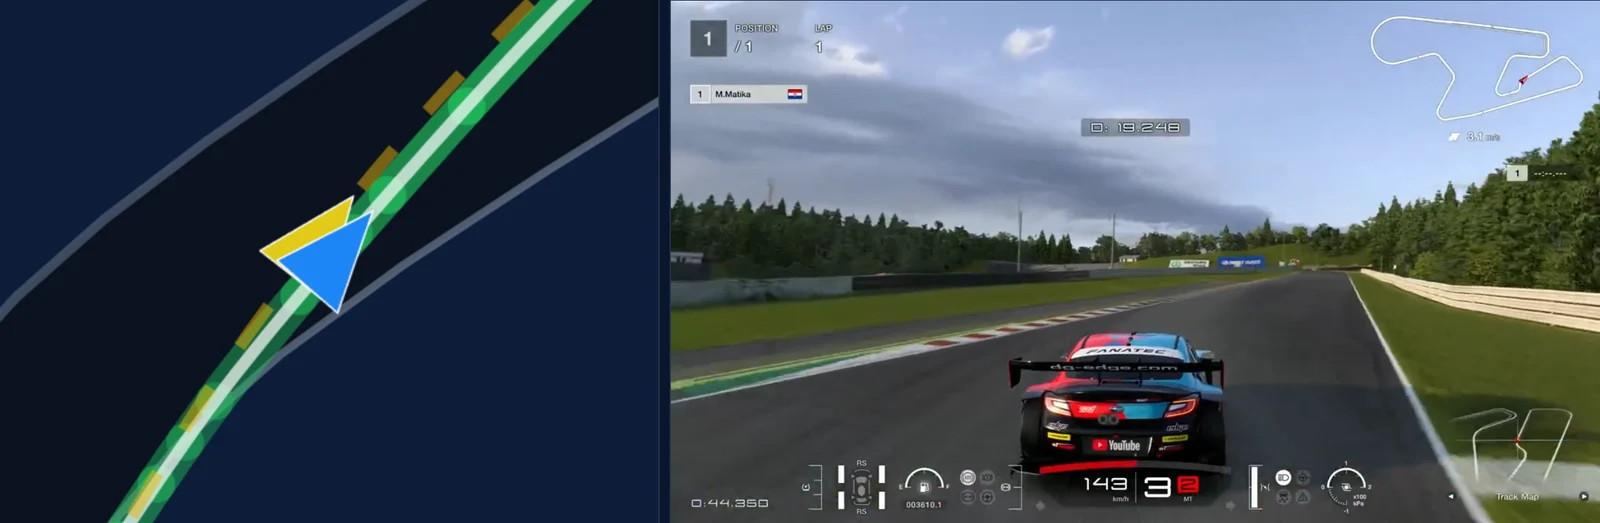
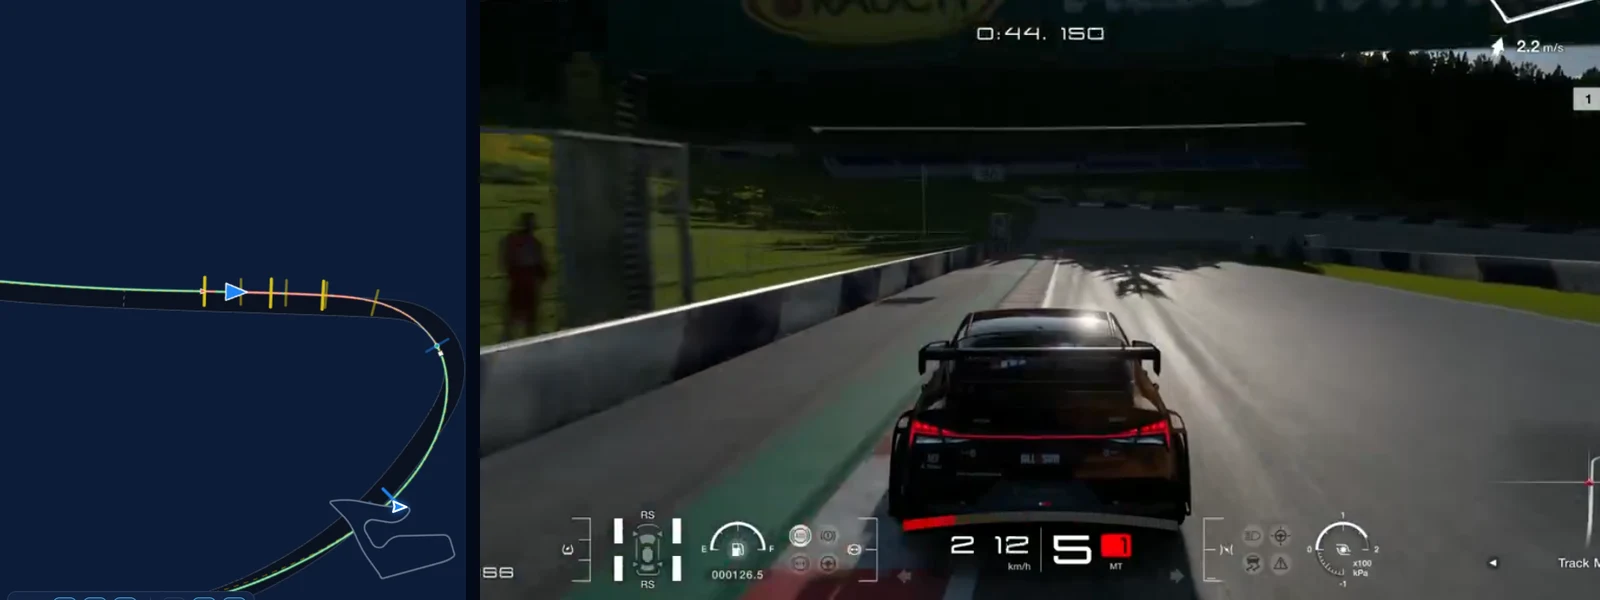
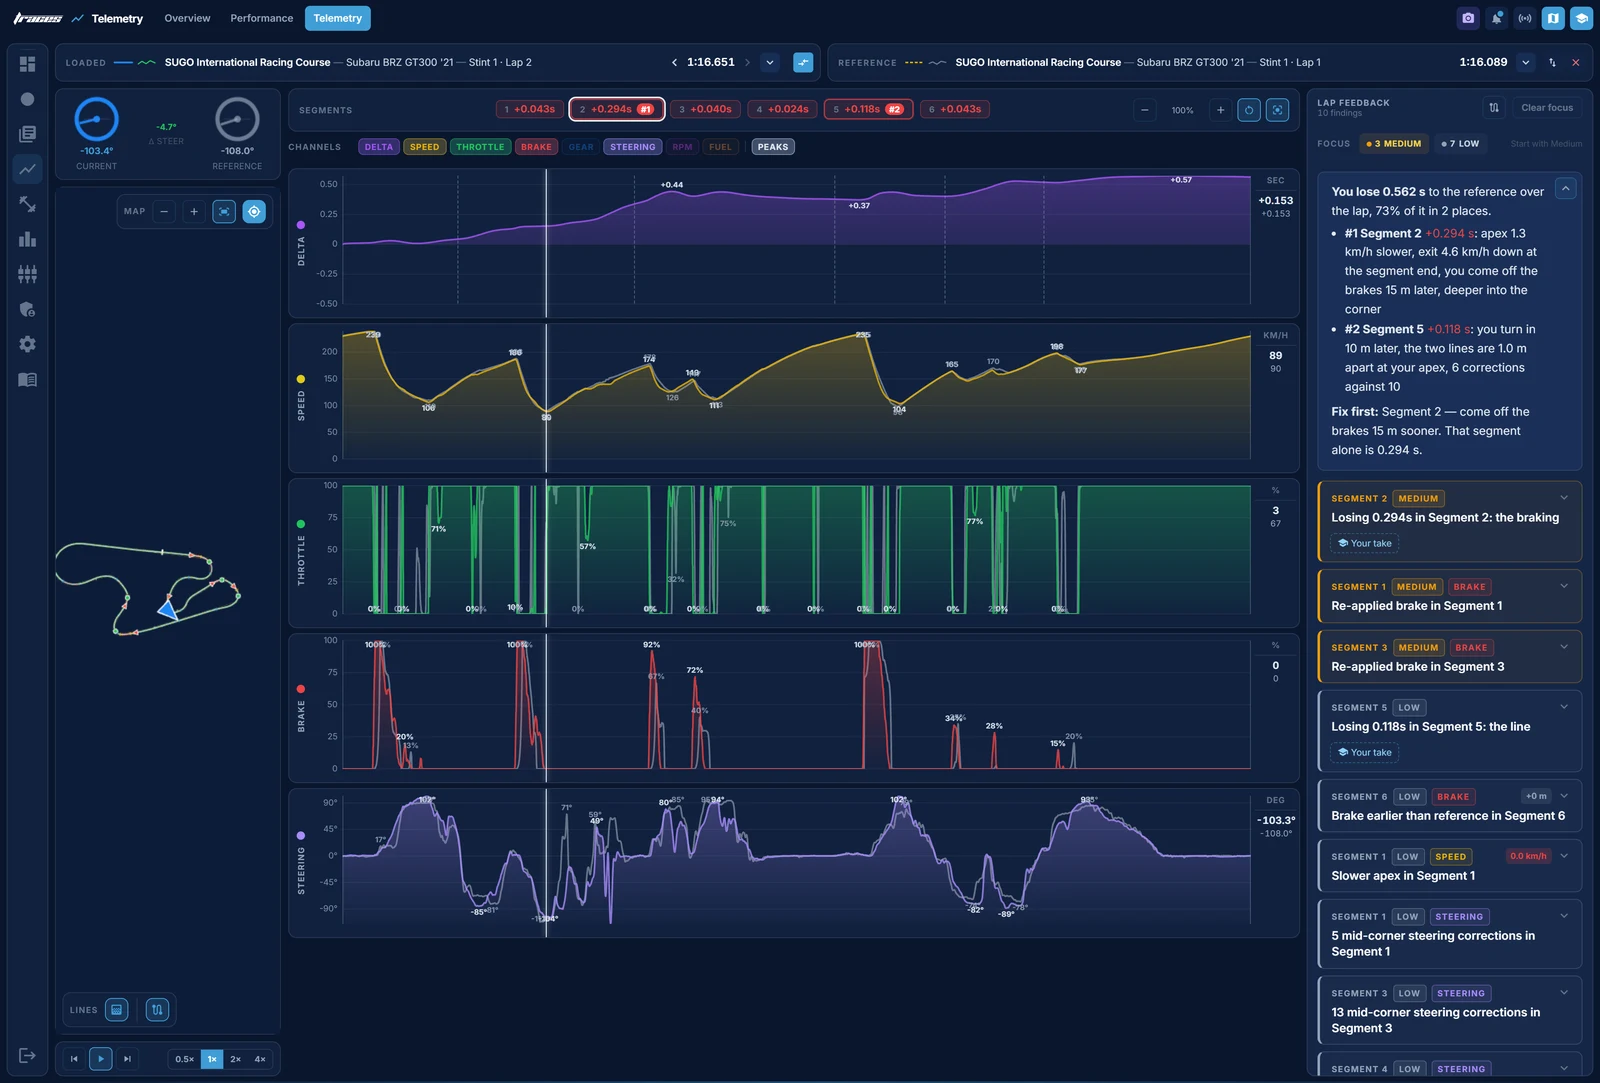
Telemetry in Gran Turismo 7 shows you where a lap loses time, corner by corner, and why. To show how to use it, we took our best lap of SUGO in the Subaru BRZ GT300, a 1:16.651, and put it against the event reference, a 1:16.089, in Traces.
The gap is 0.562 s. By the end of this, we know where every hundredth of it goes, and most of it is not where we first looked.
A reference recorded from a replay
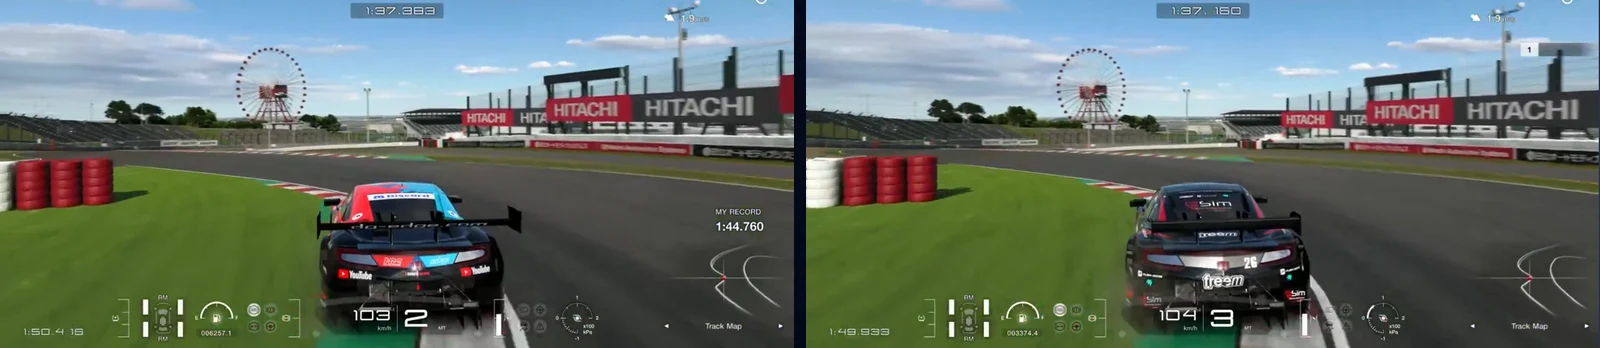
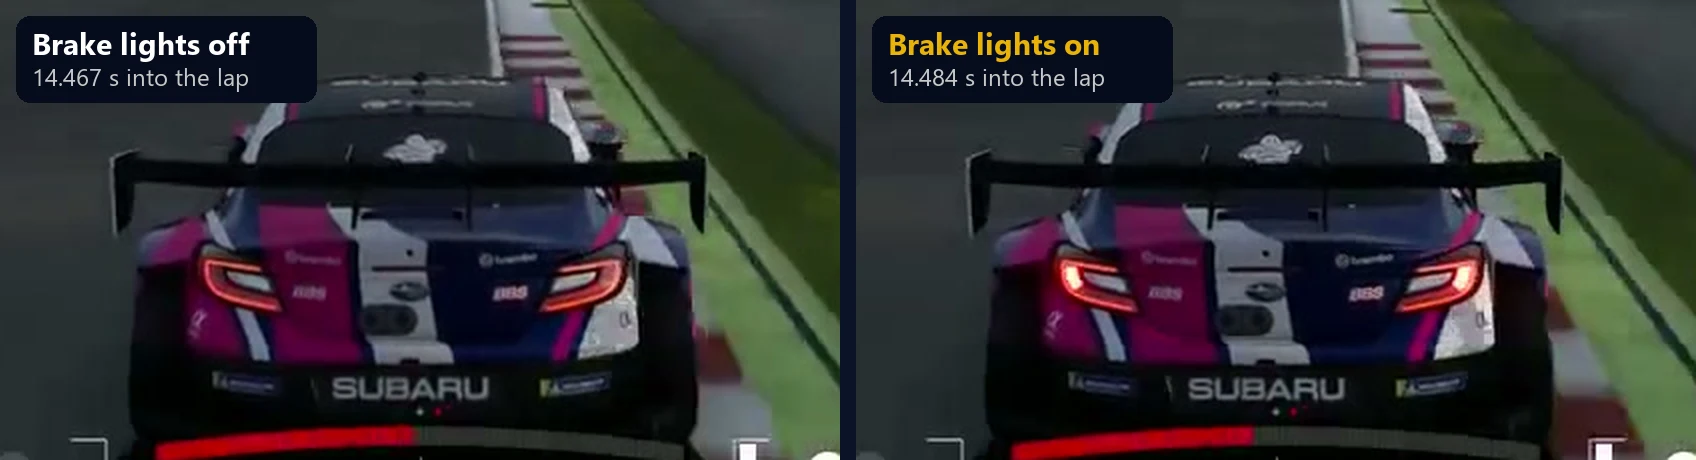
There is one catch with replays. GT7 sends a replay's brake data late, and builds it up slowly, so on paper a replay driver brakes later than they really did. The video does not have that problem, because the brake lights come on when the driver brakes. We checked every braking zone of the reference frame by frame, and in five of the six the lights came on 0.07 to 0.17 s before the data showed any brake at all. Traces 2.0.2 now corrects for this when it compares brake points.
Start with where the gap builds
Our lap came from practice for the Gr.3 race at SUGO in week 44's Daily Races, and the reference is Vitality_Kylian's 1:16.089, one of the laps the team set as references for Race C.
The Performance page is the place to start. It plays the lap on the map with the reference's video beside it, splits the track into segments with the time lost in each, and its Lap Feedback lists what to fix first. At SUGO, Segment 2 alone holds more than half the gap, and Segment 5 adds another tenth. That tells us where to look. To find out why, we go corner by corner.
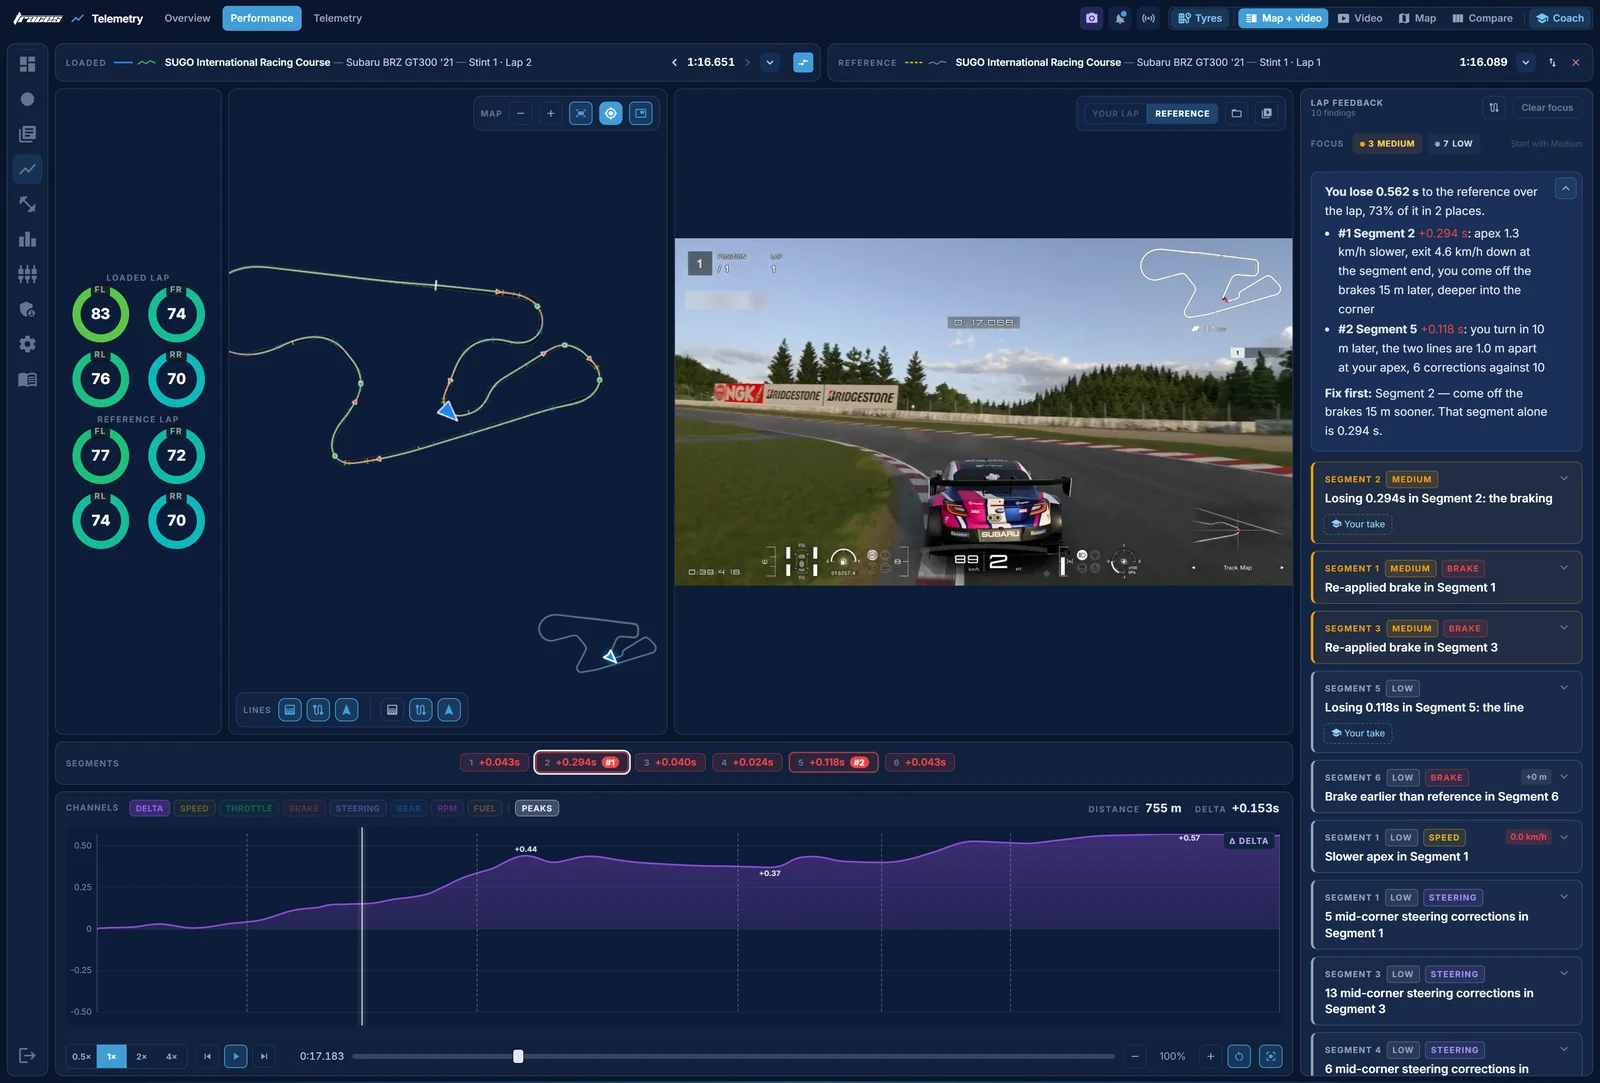
Each corner below has the same two pictures. The first is the Performance page with the car at that corner: the map zoomed in, our line in green and the reference's dashed in yellow, and the reference's replay at the same metre. The second is the Telemetry page zoomed to the corner, with its own map on the left. Where we compare brake points, we use the reference's brake lights, not its replay data.
Corner 1: the right-hander at the end of the main straight
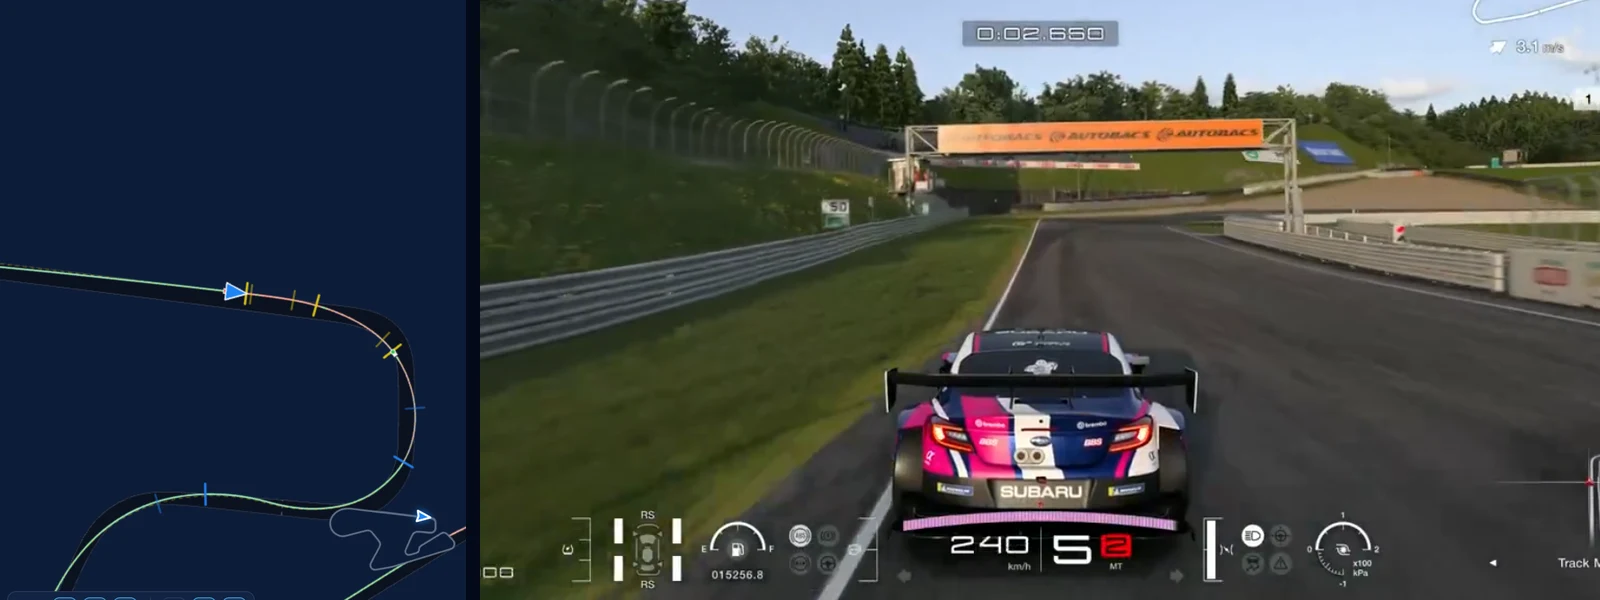
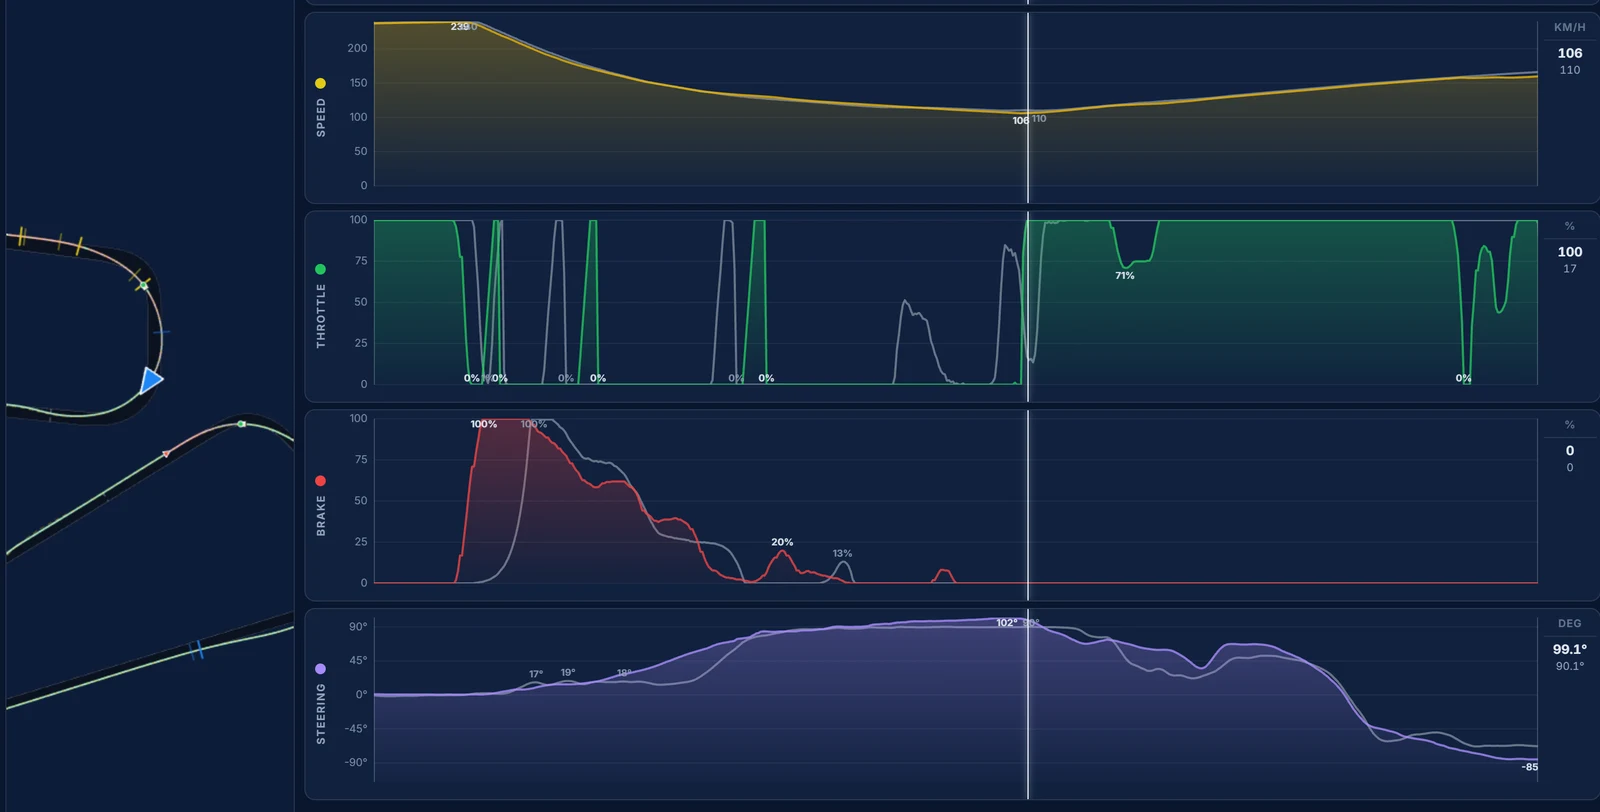
We arrive at 239 km/h, the same as the reference, and we are on the brakes at 166 m where its brake lights come on at 171 m. Five metres is not where the time goes. It goes in the release: we come off the brake, go back on it, and are still braking at 314 m, where the reference is off by 283 m. That costs the apex, 106.0 km/h against 109.8, and we leave the corner 3 km/h down. Corner 1 is worth 0.10 s.
Corner 2: the second-gear left-hander
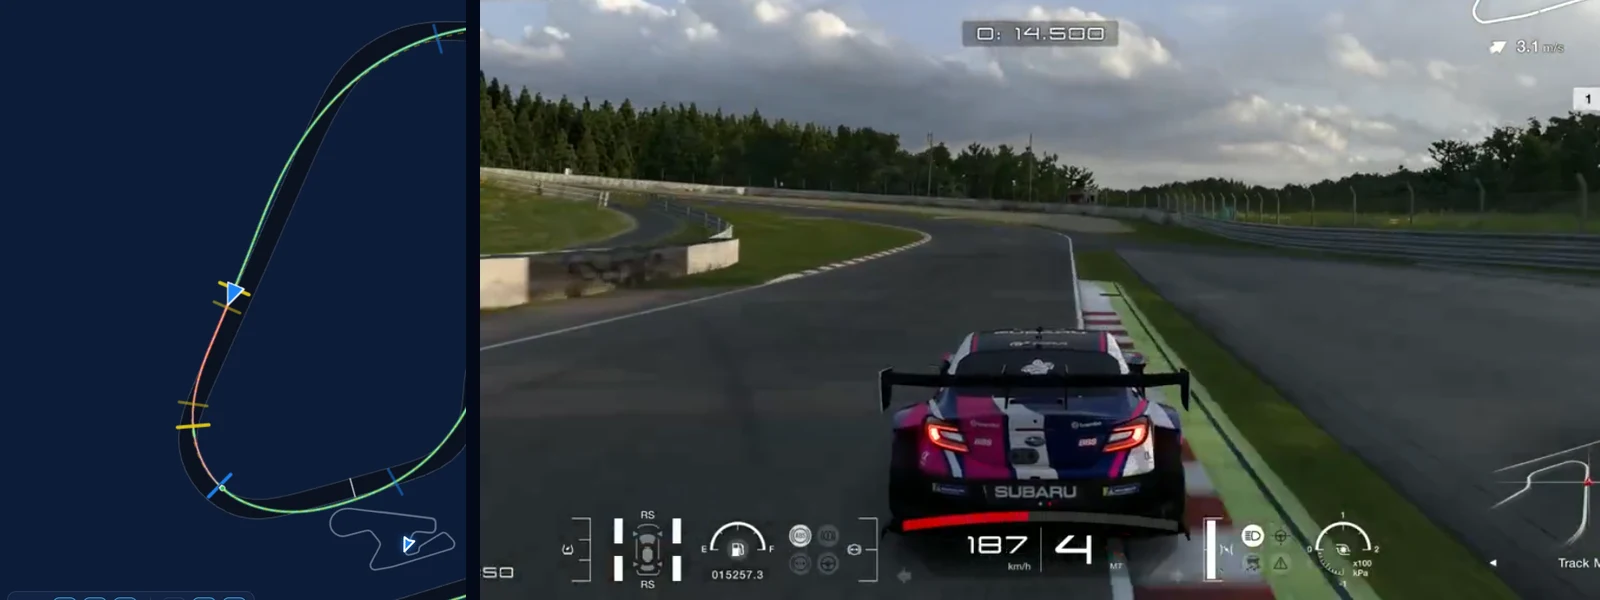
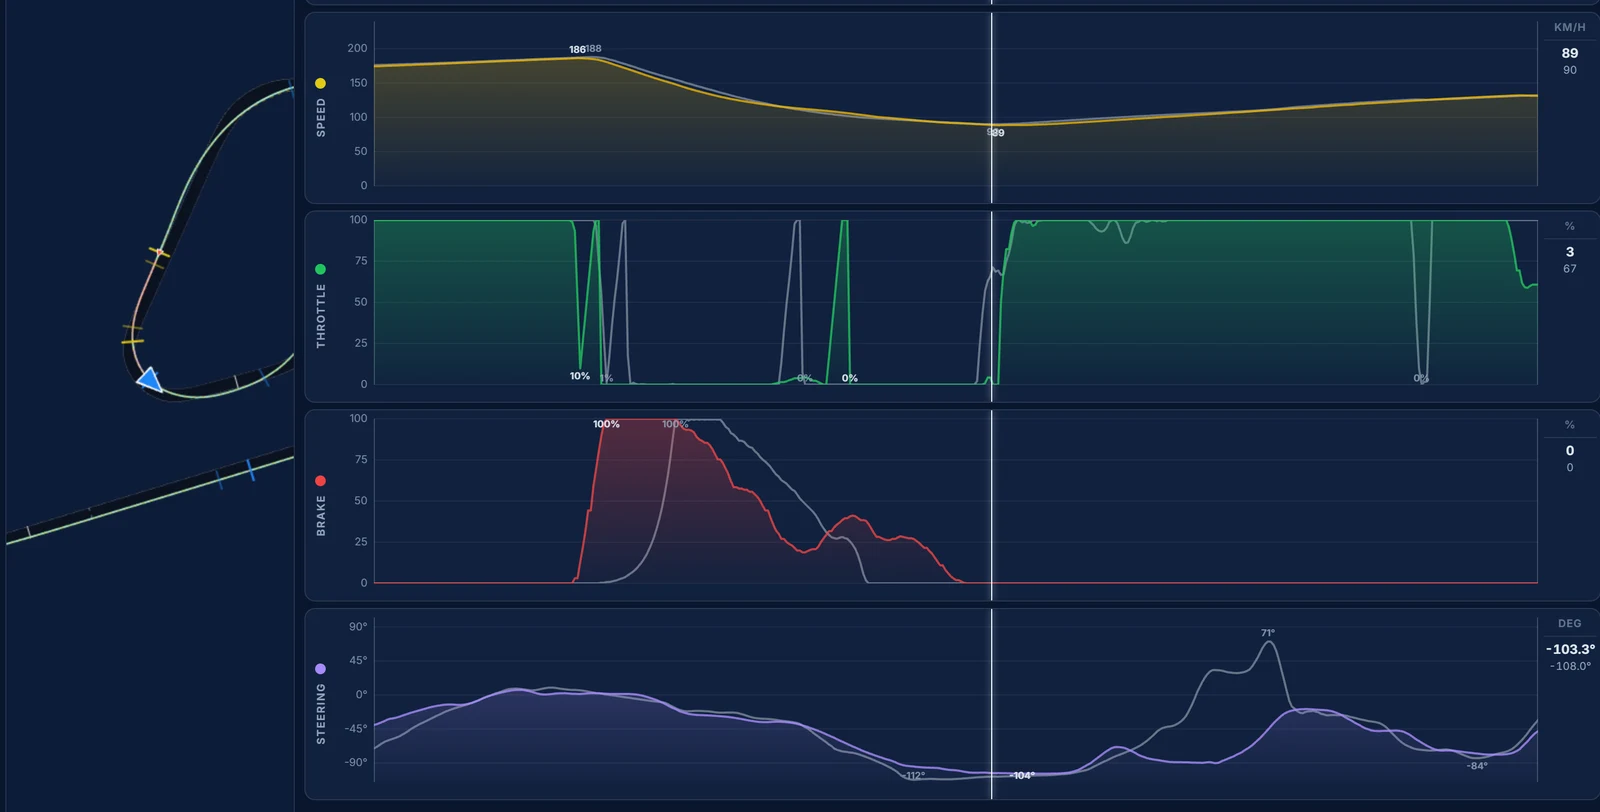
This is the slowest corner on the lap, and the braking is as good as the reference's: our first touch is at 664 m and its brake lights at 668 m. The difference is how long we stay on the pedal. The reference is off the brakes by 734 m; we are still on them at 751 m, almost at the apex, and we reach it at 88.5 km/h against 89.9. Back on the throttle, both cars match. Corner 2 costs 0.08 s, part of it carried in from the slower exit of Corner 1.
Corner 3: the right-hand bend at 900 m
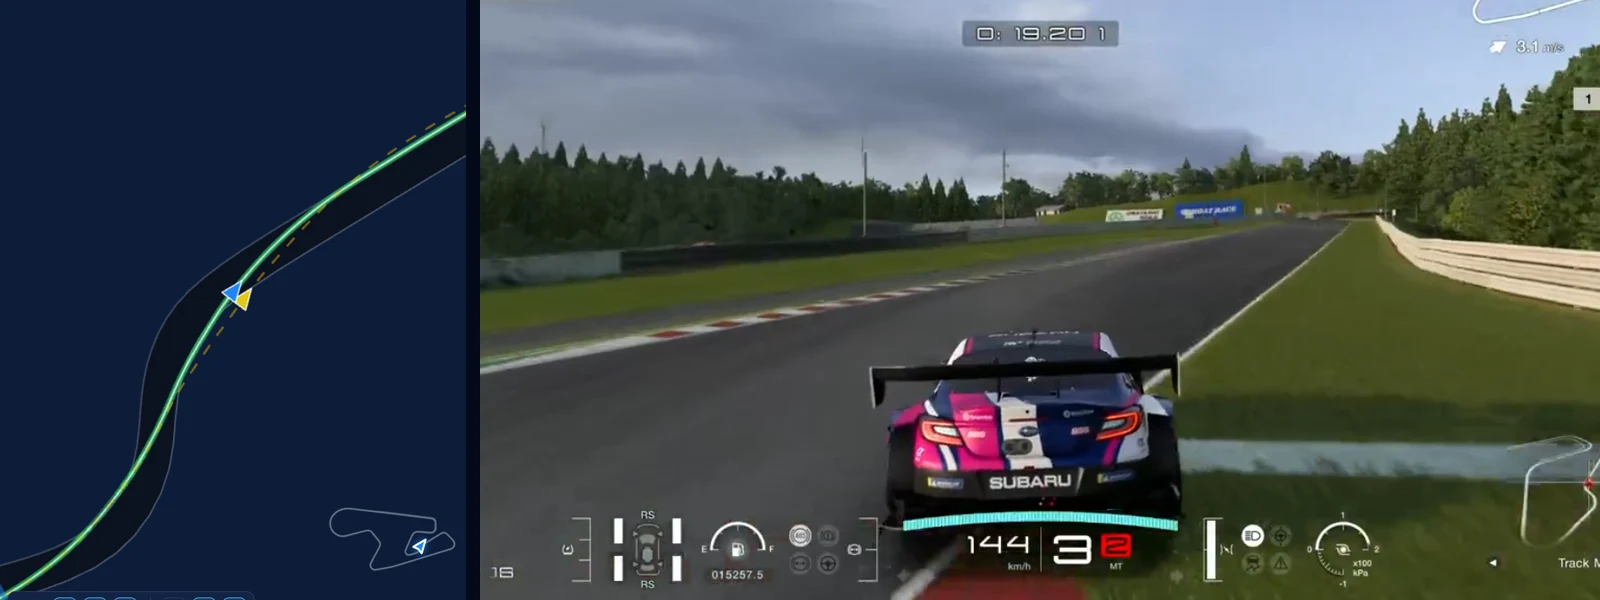
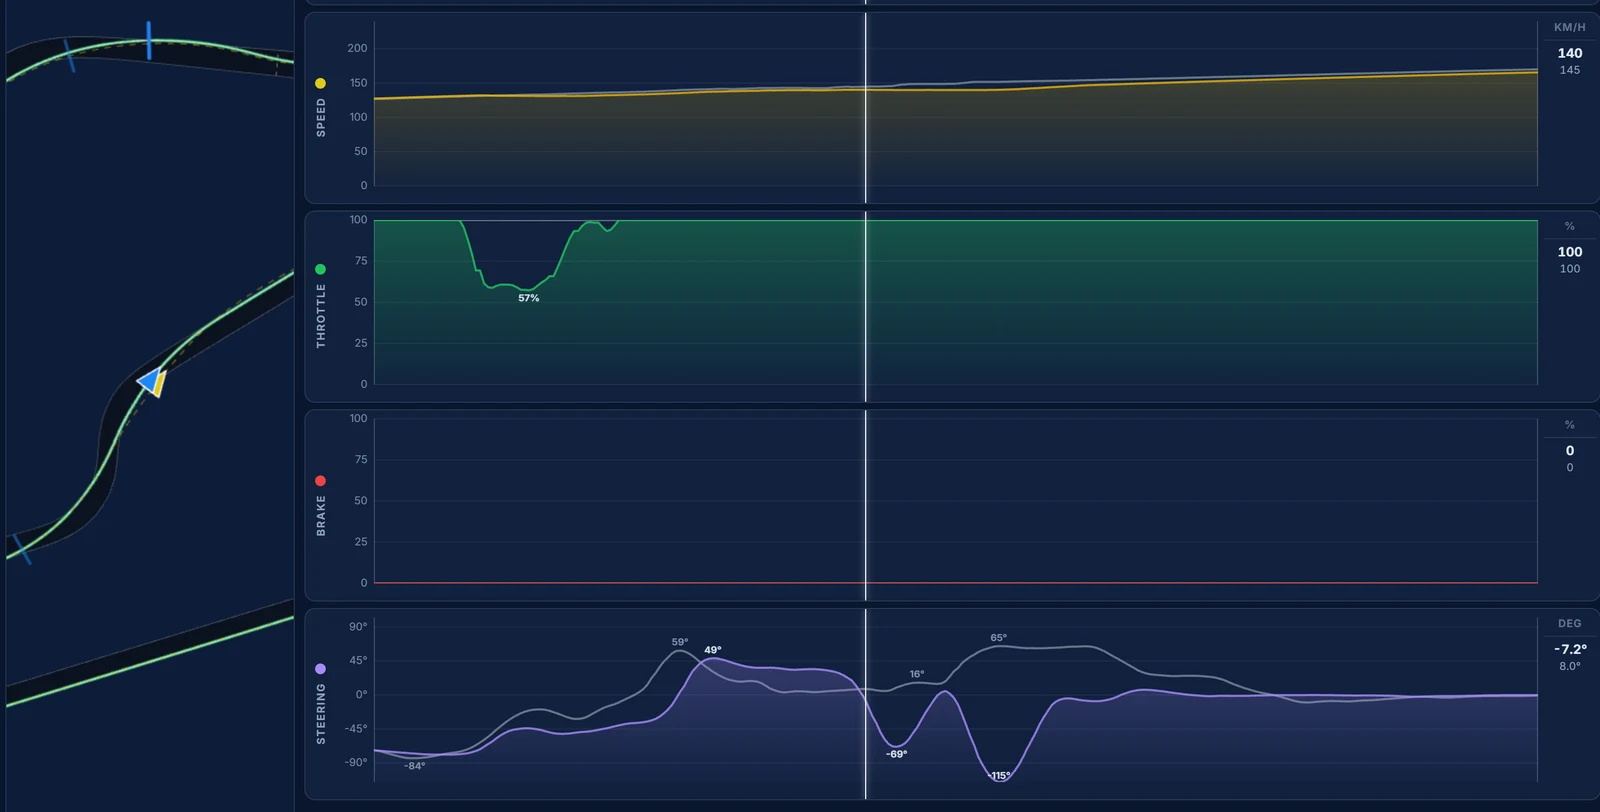
This is the most expensive corner on the lap, and there is not a brake pedal anywhere near it. Both cars are flat out from the exit of Corner 2. But look at the steering trace: the reference holds one steady input through the bend, while ours swings the other way, to more than 100 degrees of opposite lock. The car stepped out as we put the power down, we caught it, and it ran 2.7 m wide. Our speed stalls at 140 km/h for 20 metres while the reference keeps accelerating to 150, and we reach the end of the segment 4.4 km/h down.
The biggest single loss on the lap, 0.16 s, comes on full throttle with no brake anywhere near it. No brake trace would ever have shown it. The steering trace and the map do.
Corner 4: the right-hander after the bend
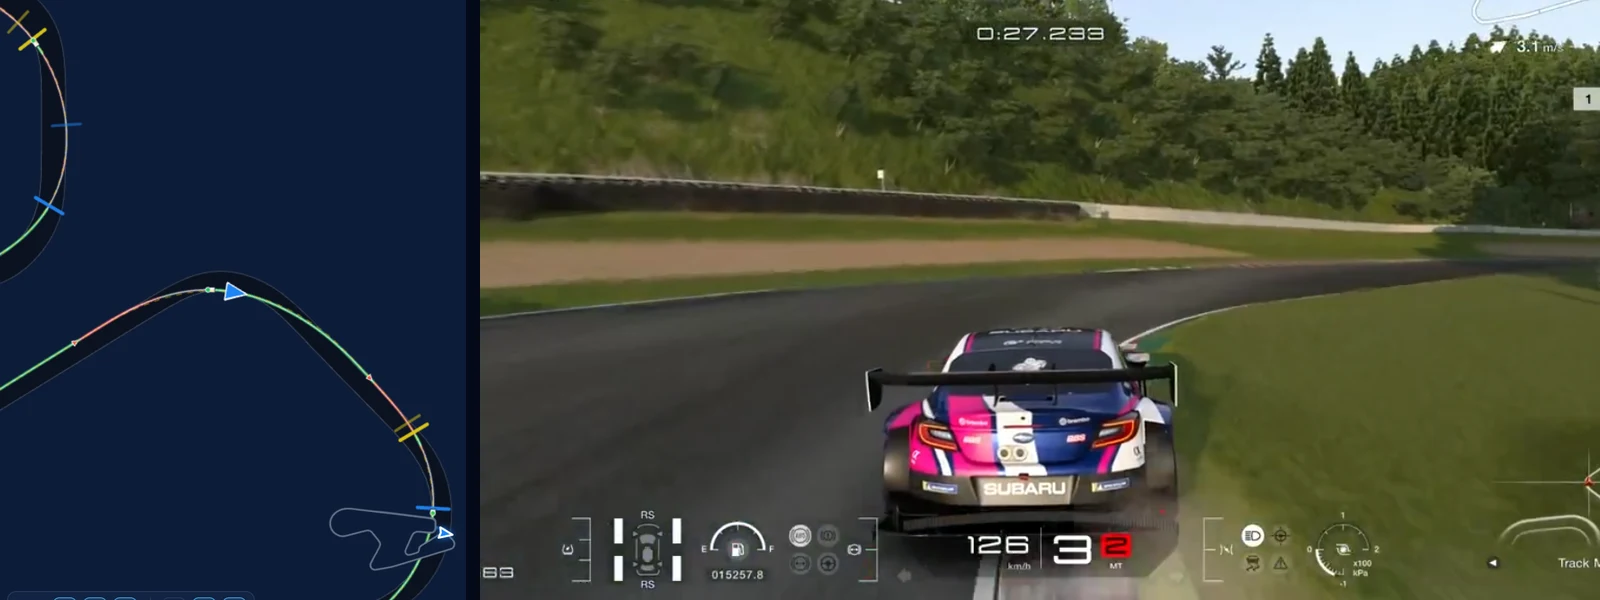
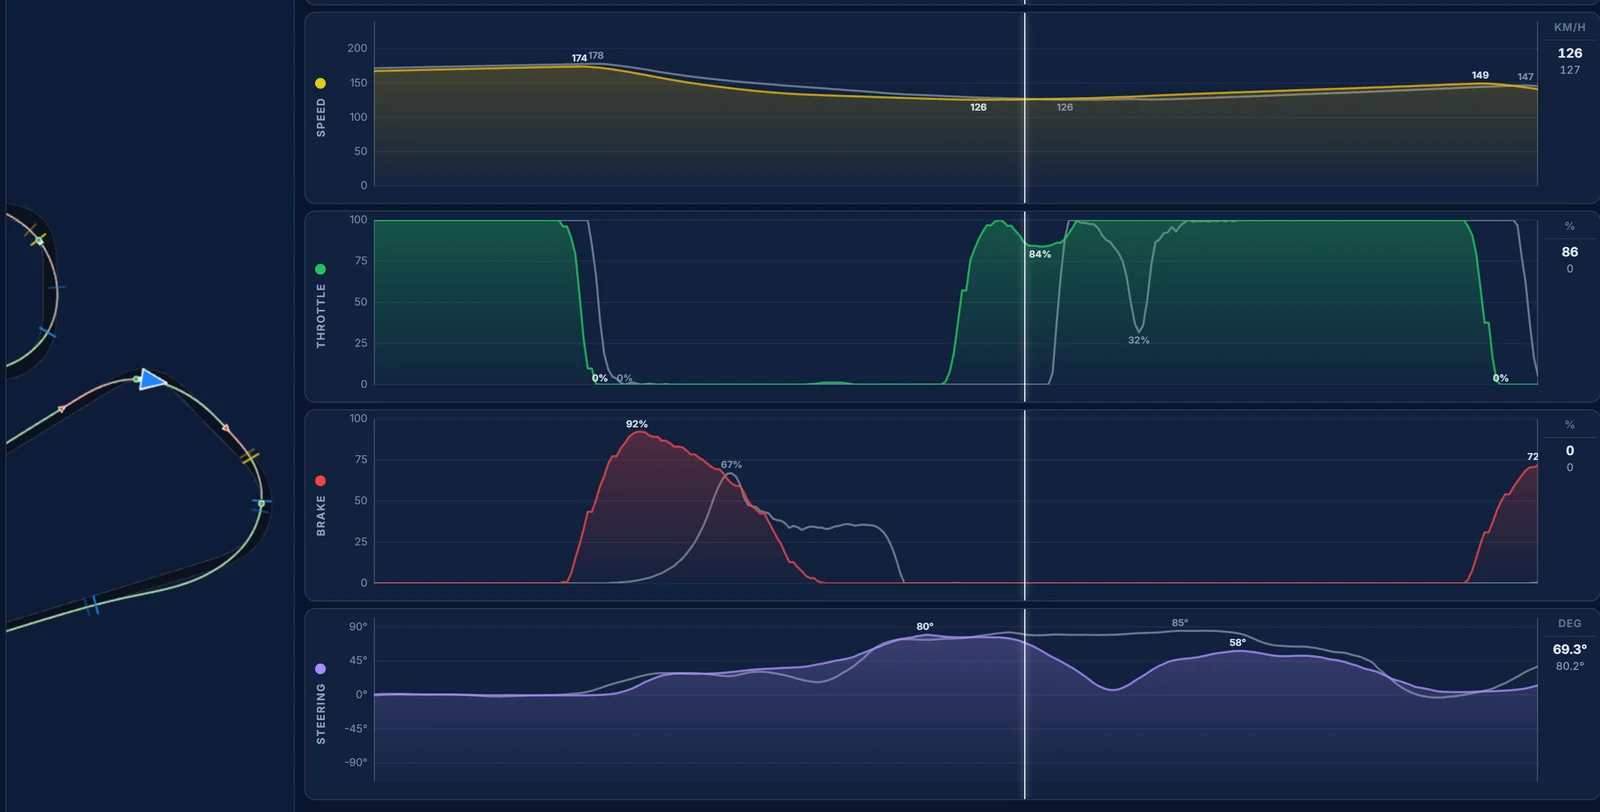
We arrive 4 km/h slower, still paying for the slide, and brake 6 m before the reference's lights and harder. Our apex comes 12 m earlier at the same 125.6 km/h, and we leave faster than the reference does. It still costs 0.04 s, and the Coach counts 13 steering corrections in this segment: the car is busy, even if the result is close.
Corner 5: the right-hander at 1,290 m
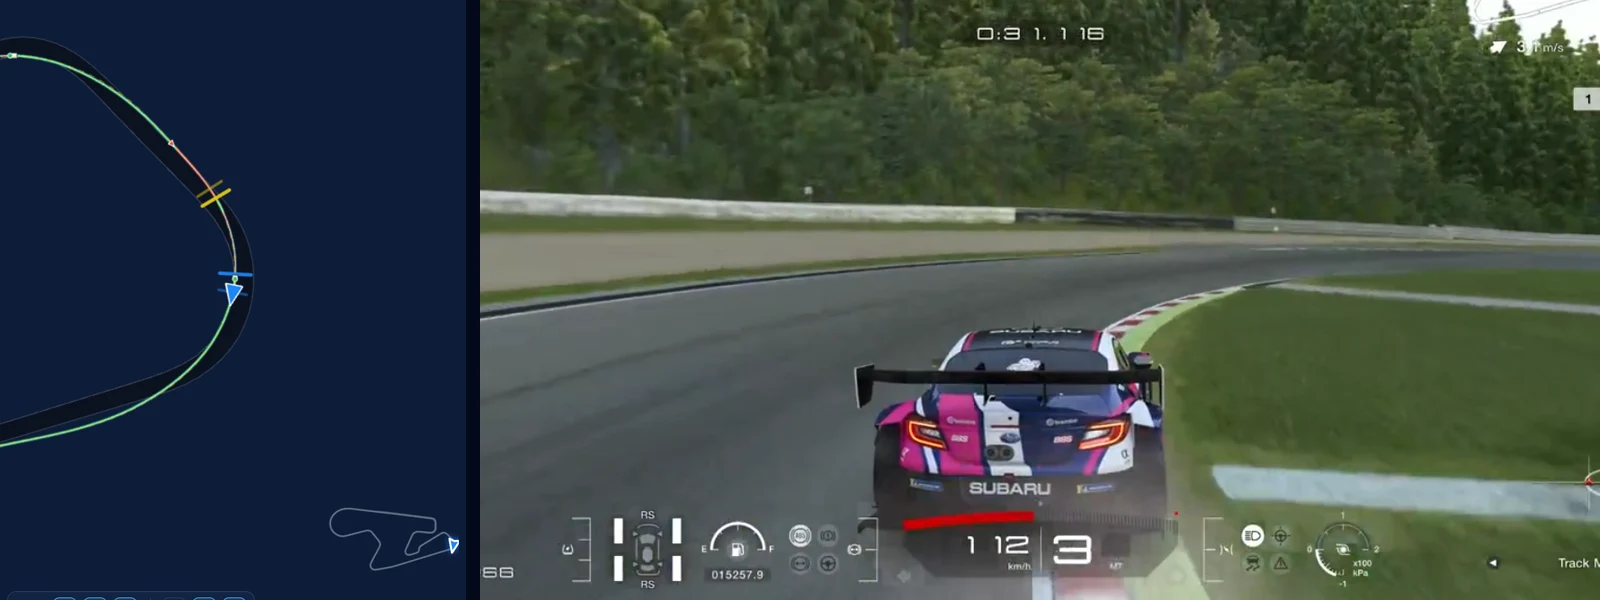
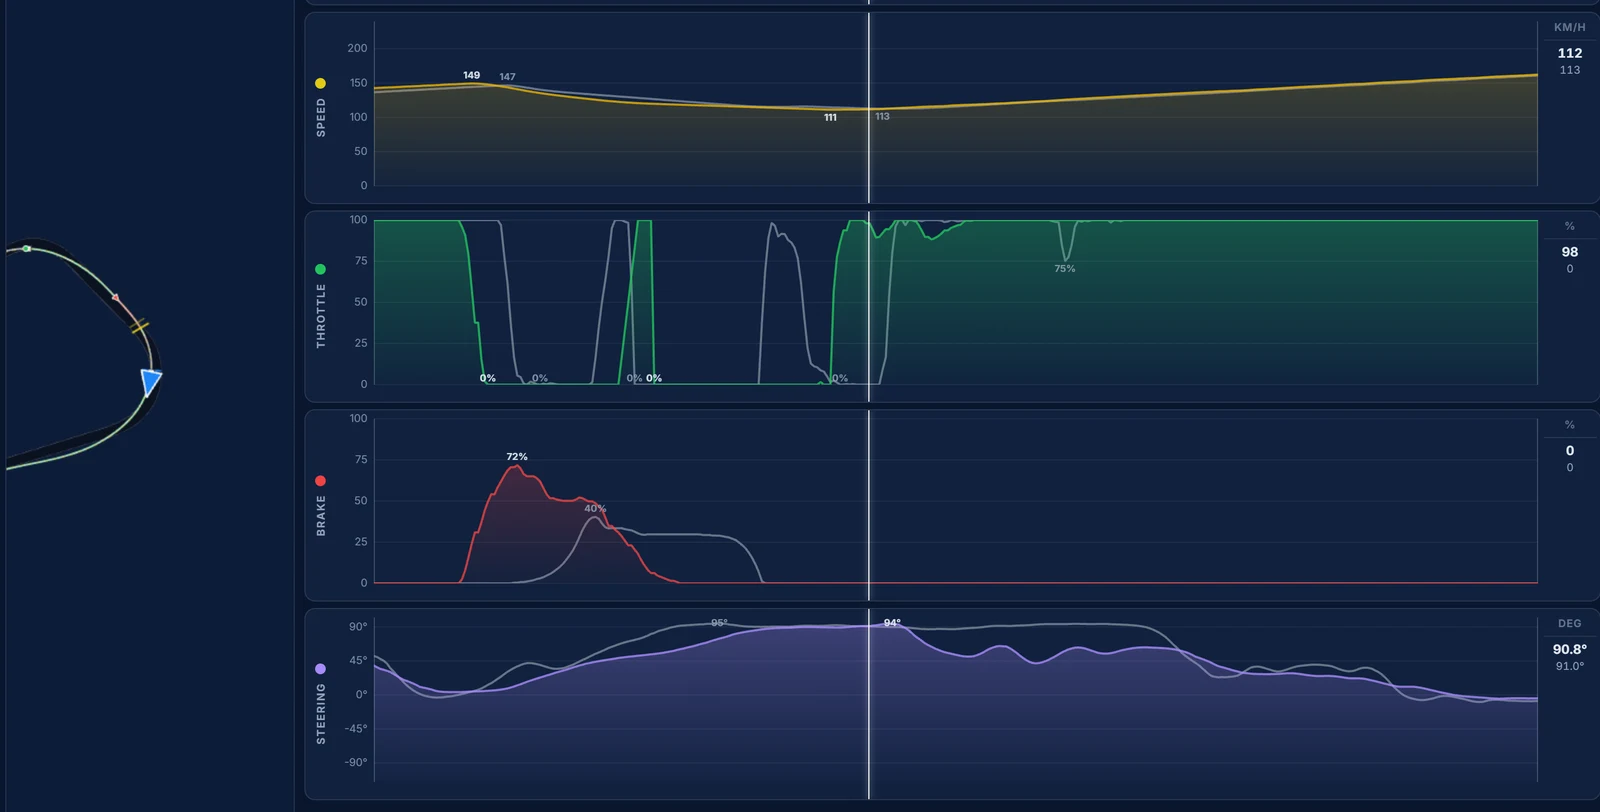
Here the two laps are level. The brake points are 5 m apart, the apex speeds 111.2 and 112.6 km/h, and on the long run that follows we gain a few thousandths back. This is what a corner looks like when there is nothing to find, and it is worth knowing that too: time spent practising here is time not spent on Corner 3.
Corner 6: the big stop
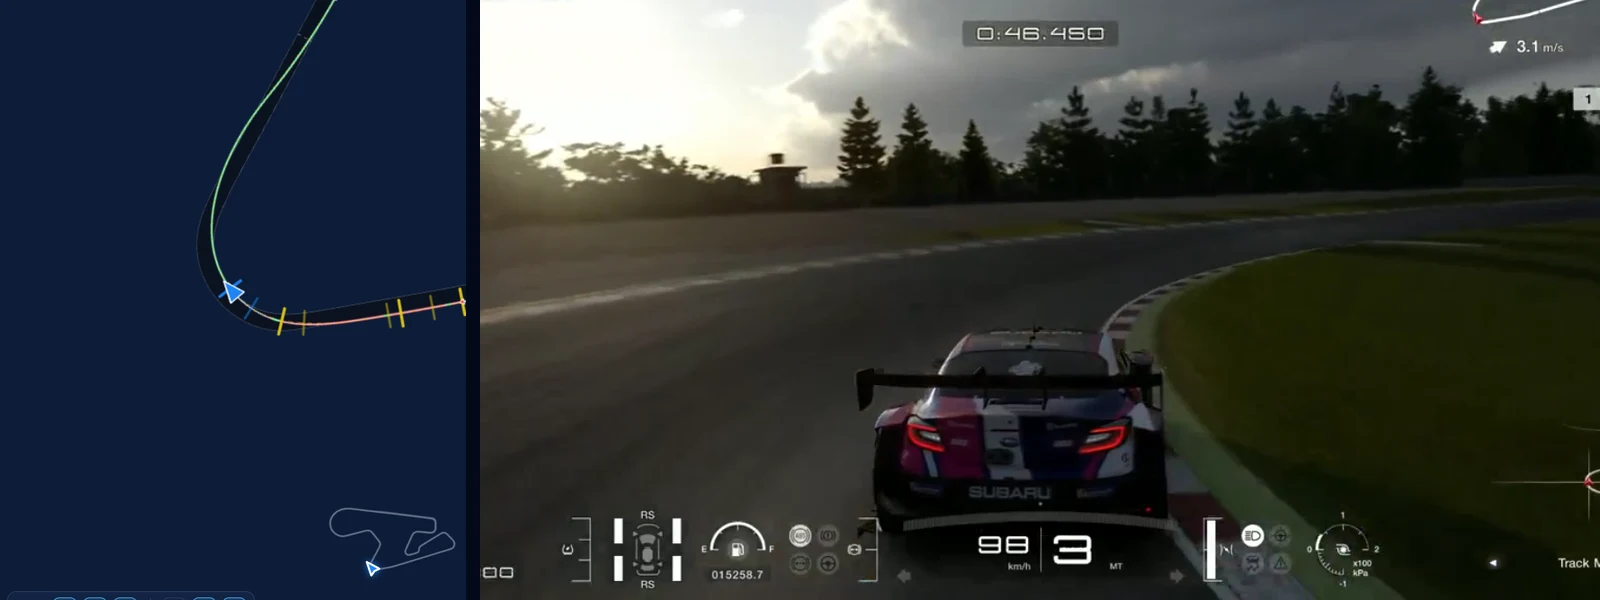
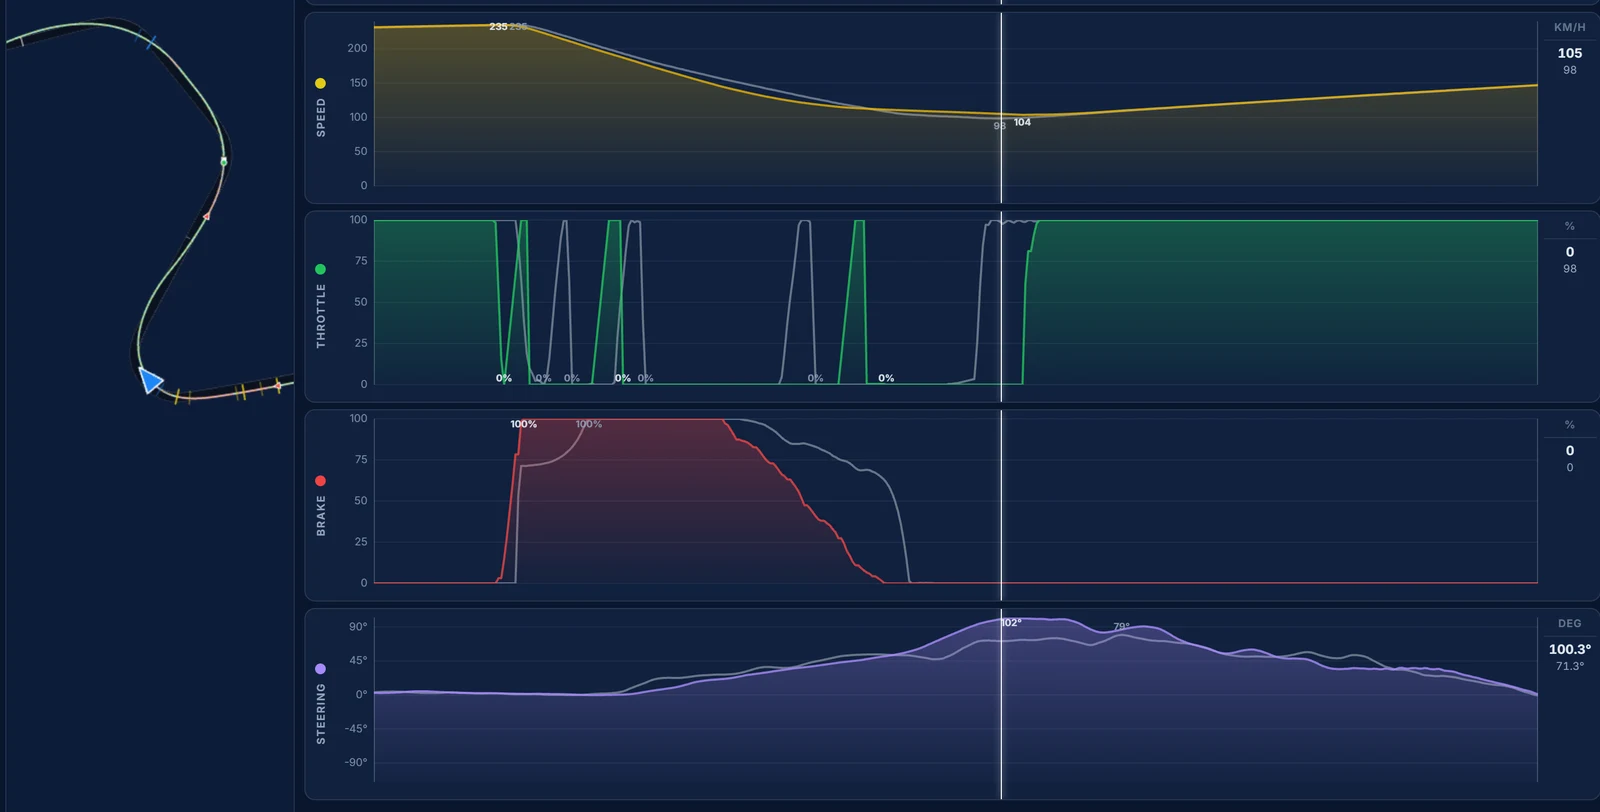
The hardest stop on the lap, from 235 km/h, and the one place where we brake early by a margin worth talking about: 1,928 m against the reference's lights at 1,936 m. We carry 5.3 km/h more to the apex than the reference, 103.7 against 98.4, and come out at exactly the same speed. The extra apex speed buys nothing and the early brake costs 0.03 s. The reference's way is the better trade: brake later, accept the slower apex, and get the car turned.
Corner 7: the left-hander at 2,275 m
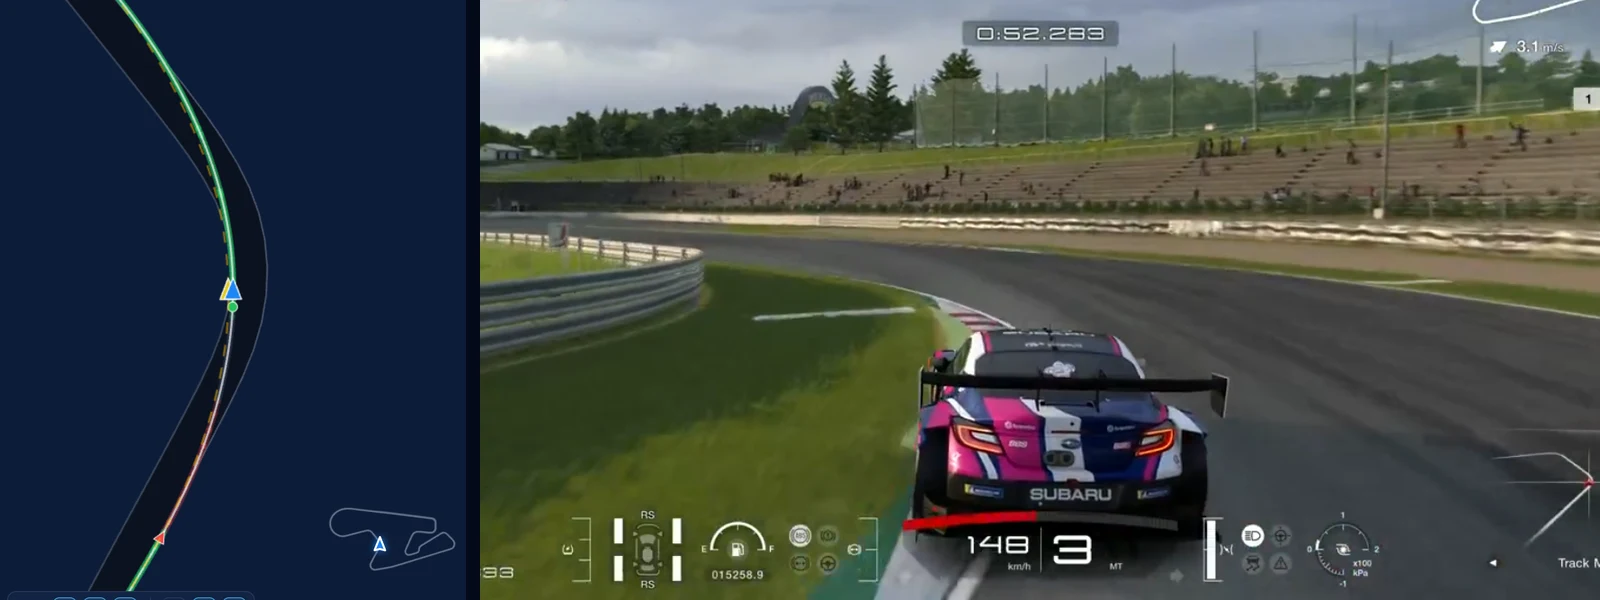
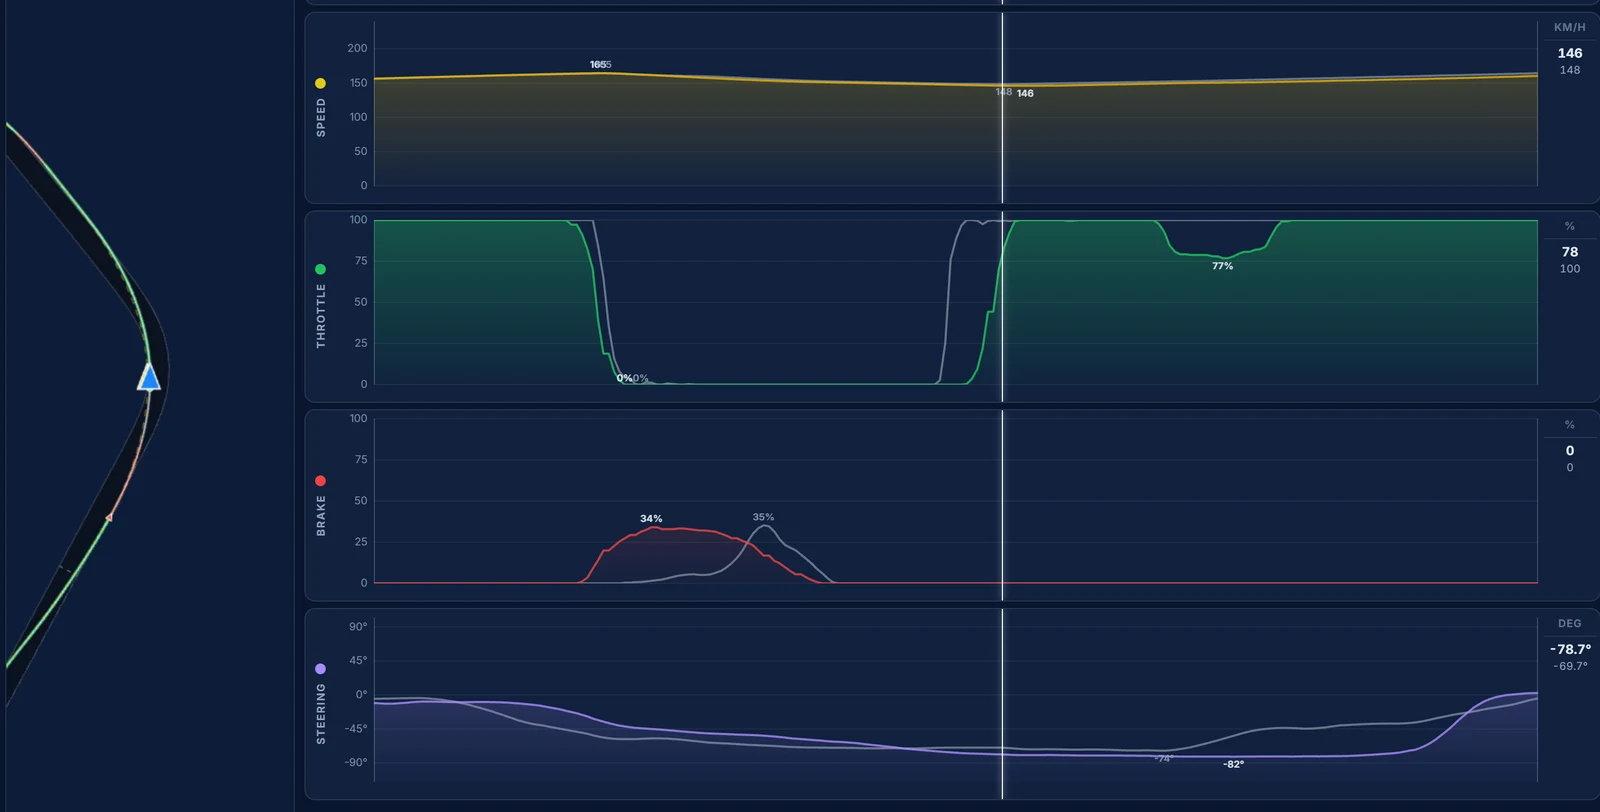
A fast third-gear corner with a light touch of the brake on both laps, and the brake points are 4 m apart. The difference is the line. Ours runs up to a metre wide of the reference's on the outside of the apex, we carry 146.1 km/h through it against 148.4, and we leave 4 km/h slower. Corner 7 costs 0.07 s.
Corner 8: the kink
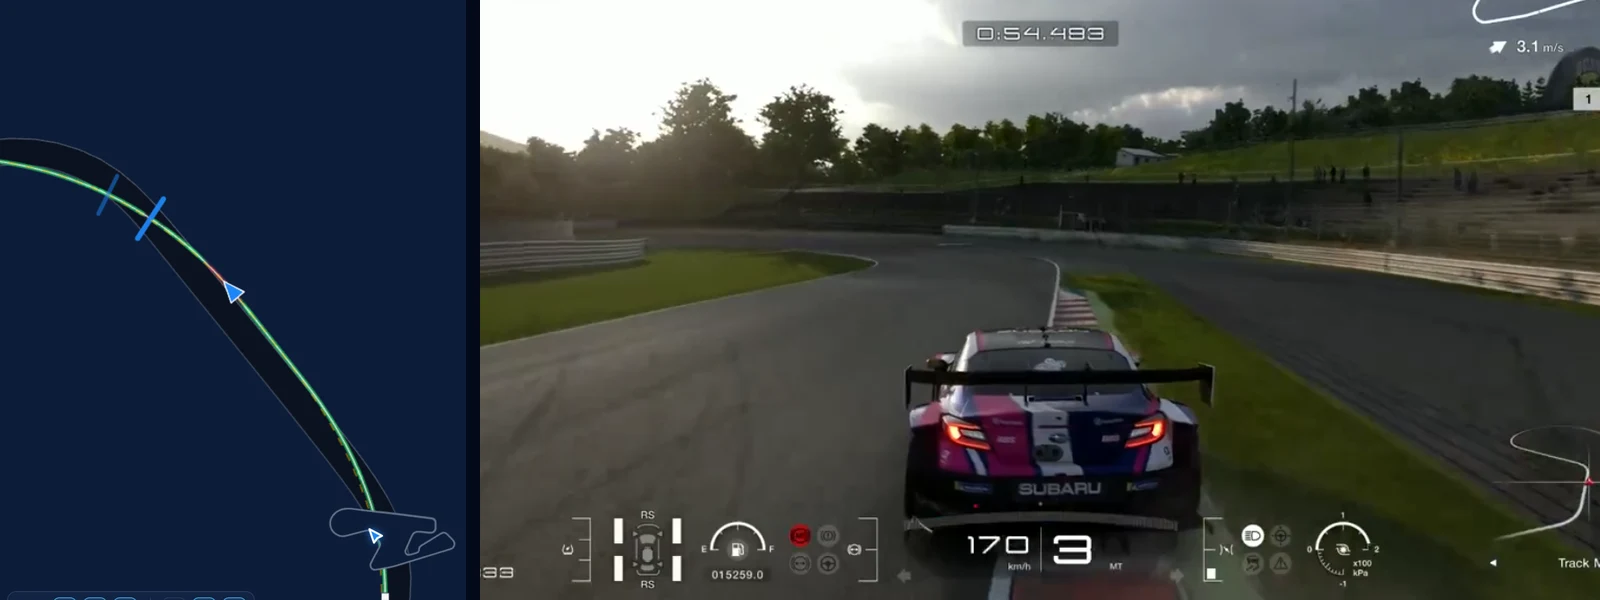
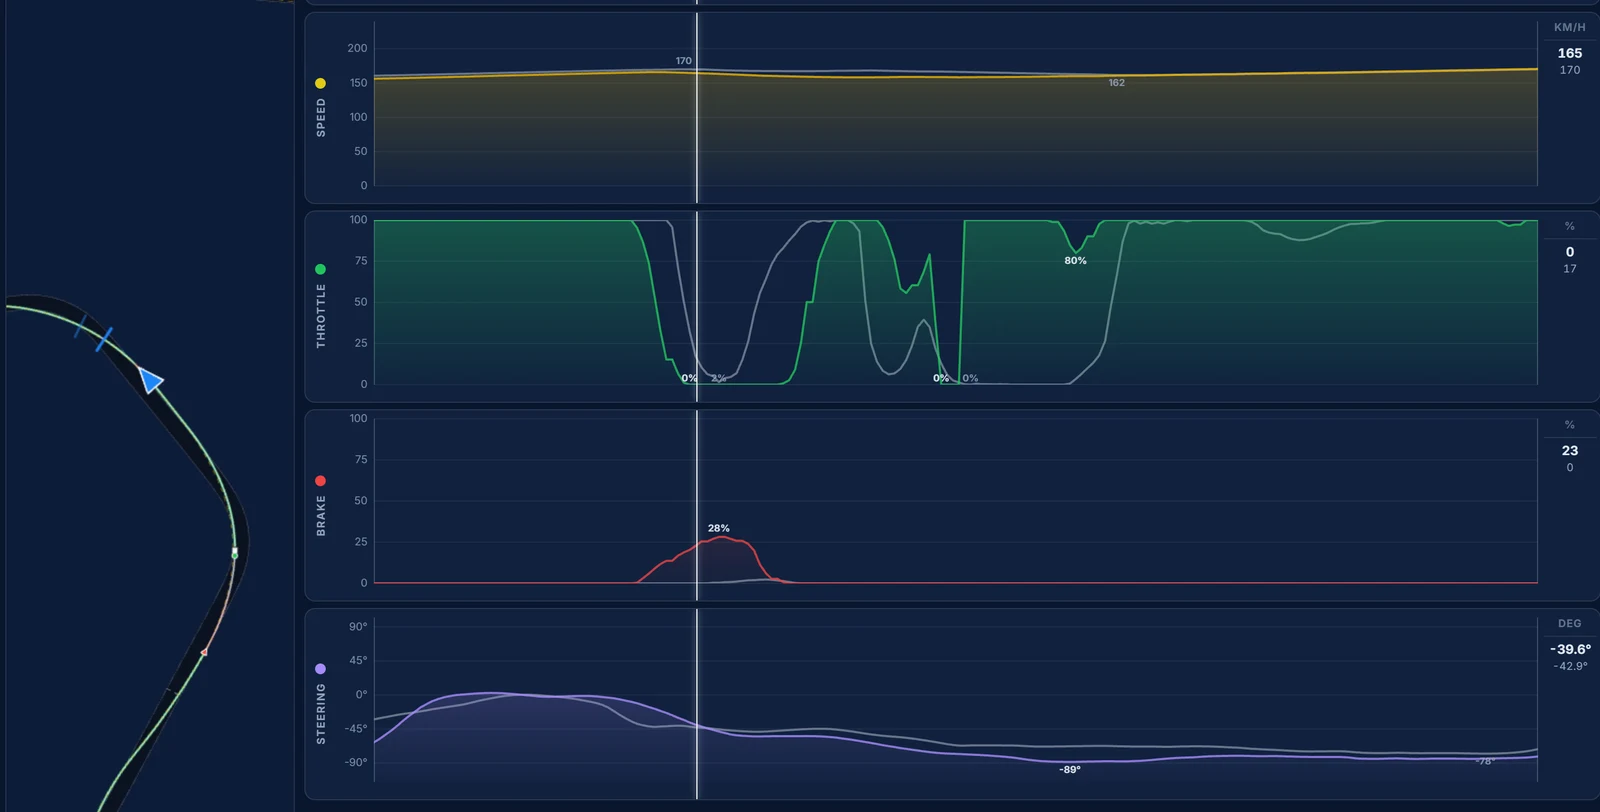
Straight after Corner 7 comes a kink the reference takes on a lift, with at most a brush of the brake. We brake, up to 28%, slow 30 m earlier than the reference does and 4 km/h further, 158.4 against 162.8 km/h. Back on full throttle, the two laps leave at the same speed, but the early slow-down has cost 0.05 s.
Corner 9: the last corners
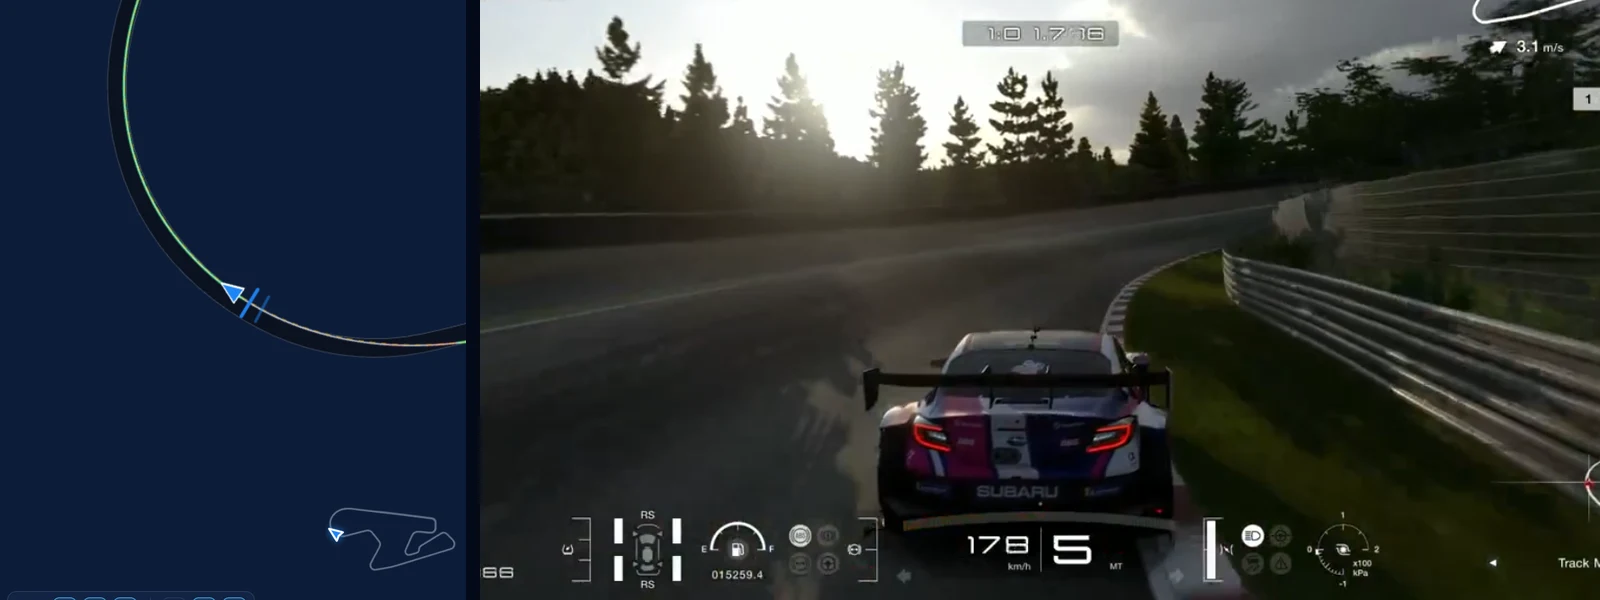
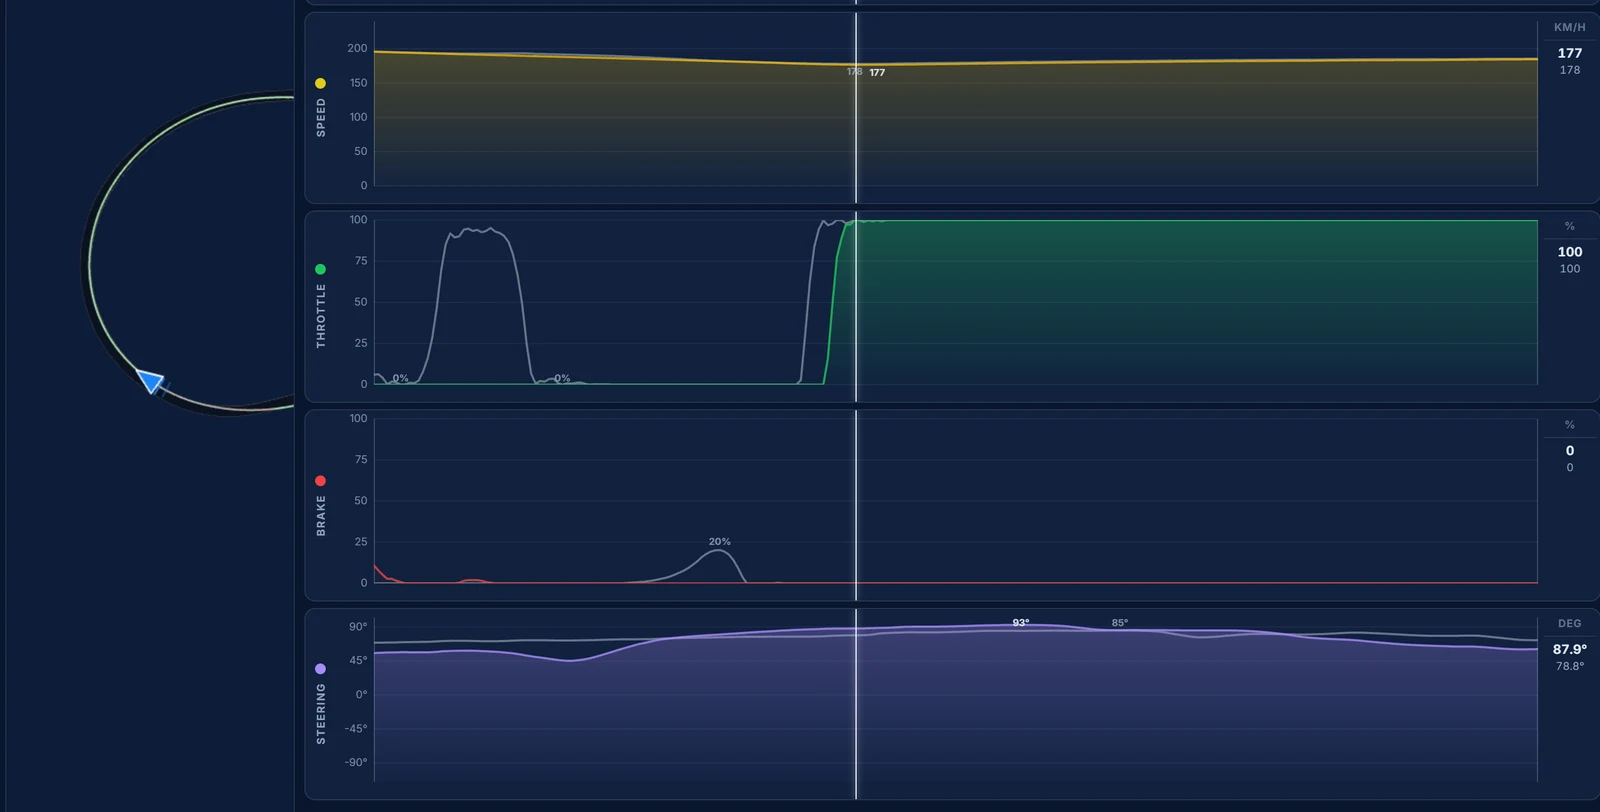
The run to the line is level: apex speeds within 1.1 km/h, the same exit, a hundredth lost. Like Corner 5, there is nothing here to chase.
What we take from it
Five corners hold 0.45 s of the 0.562 s. In Corners 1 and 2 the brake point is right and the release is late: we hold the brake 17 to 30 m longer than the reference. In Corner 3 the time is in the exit of Corner 2, where a car that slides on the power costs more than any brake point on the lap. And in Corners 7 and 8, it is a tighter line and a lift instead of the brake. None of that is "brake later", which is what the brake trace alone suggested at first.
If this is the kind of thing you want to find in your own driving, our introduction to Traces explains what Traces does, and our list of reasons you can't go faster covers the habits behind most of the corners above.
Final Thoughts
Telemetry is only useful if it changes what you do on the next lap. Going corner by corner turned "half a second" into four things to work on, and the biggest of them was not on the brake trace at all. Record your laps, compare them with a faster driver's, and read the steering and the line as carefully as the pedals. You can download Traces for Windows and macOS.
Do it on your own laps
Load your best lap in Traces, pick a faster one from the leaderboard as the reference, and go corner by corner the same way: the Performance page for the line and the video, the Telemetry page for the traces.