 Daily Race C
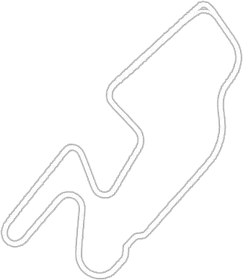

TCR_Bob126 posted this lap in the Lap Analysis thread on the Traces forum, with the replay and the Traces session: the 1:55.241, lap 1 of the session. Here it is against Digit's best lap from Daily Race C, Week 45/2026, a 1:54.249 in the same car, corner by corner.
This one is a little different from the other analyses. Both laps were recorded live, so the brake trace is the real one on both sides. That shows not only where each driver starts braking, but how hard they press and when they come off the brake. Bob's session is complete: the data runs 115.217 s against the official 1:55.241, a difference as small as Digit's lap's (114.233 s against 1:54.249). Bob's replay was filmed too, so every corner below has both videos side by side. The tyres aren't in the files, so it isn't known whether both cars were on the same ones. Every number comes from Traces: the Coach, or the telemetry of the two laps measured at the same point on the track. Distances are metres from the start line along Digit's lap, and the corners are numbered by where Digit slows down, turn 1 to turn 8.
The summary
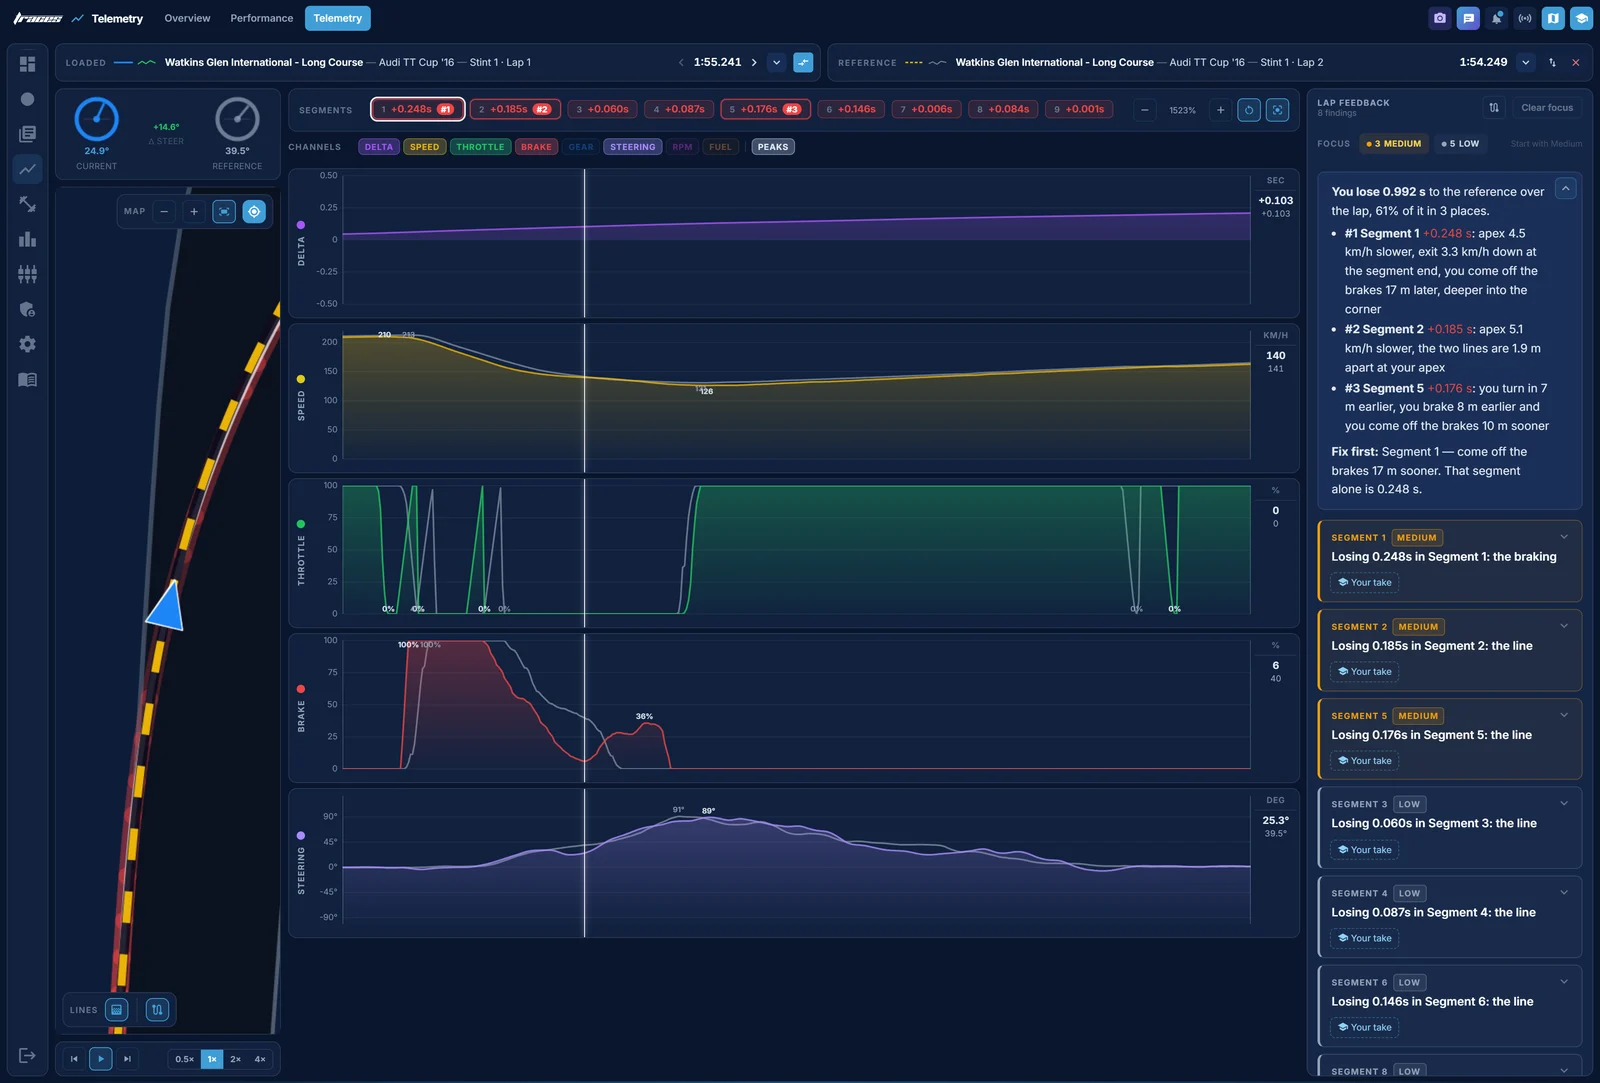
Bob loses 0.992 s over the lap. The Coach puts 61% of it in three places:
- Segment 1, +0.248 s: apex 4.5 km/h slower, exit 3.3 km/h down at the segment end, the driver comes off the brakes 17 m later, deeper into the corner.
- Segment 2, +0.185 s: apex 5.1 km/h slower, the two lines are 1.9 m apart at the driver's apex.
- Segment 5, +0.176 s: the driver turns in 7 m earlier, brakes 8 m earlier and comes off the brakes 10 m sooner.
Fix first: Segment 1, come off the brakes 17 m sooner. That segment alone is 0.248 s.
Going corner by corner, the three most expensive corners hold 0.480 s: turn 1 (0.206 s), turn 6 (0.137 s) and turn 7 (0.137 s). Turns 2 and 3 are close behind at 0.126 s. Bob loses a little almost everywhere, and almost always in the same part of the corner: the first half of the stop.
The one thing to fix first, the same as the Coach: turn 1. Both start braking 2 m apart, but Bob's brake comes off almost completely, to 6% at 300 m, and then goes back on, up to 36% at 319 m, so it's only off at 328 m, where Digit's is off at 312 m. Bob's slowest point is 126.5 km/h against Digit's 131.0. Brake in one go: press, then ease off smoothly to zero by 312 m, where the reference is off, with no second press.
The habit behind most of it
Before going corner by corner, it helps to see the pattern. Bob starts braking in the right place. What's different is the first half of the stop: Bob gets to a lot of brake straight away, so at the same metre, with both cars still braking, Bob's is already 6.9 to 12.1 km/h slower than Digit's:
| Corner | Bob's brake point | Digit's | At | Bob's speed | Digit's |
|---|---|---|---|---|---|
| Turn 1 | 229 m | 231 m | 257 m | 181.0 km/h | 190.6 km/h |
| Turn 4 | 2,638 m | 2,641 m | 2,657 m | 182.2 km/h | 191.2 km/h |
| Turn 5 | 3,148 m | 3,150 m | 3,173 m | 160.3 km/h | 172.4 km/h |
| Turn 7 | 4,200 m | 4,197 m | 4,240 m | 126.2 km/h | 136.5 km/h |
| Turn 8 | 4,899 m | 4,896 m | 4,936 m | 164.1 km/h | 171.0 km/h |
Then, in four corners, Bob's brake comes right off and goes back on before the apex: to 6% at 300 m and back up to 36% at 319 m in turn 1, to 0% at 1,899 m and back to 36% at 1,936 m in turn 2, to 0% at 2,717 m and back to 23% at 2,727 m in turn 4, and to 0% at 3,203 m and back to 23% at 3,234 m in turn 5. Digit's brake comes off once in each of them. A second press means the car was too slow or not turned in yet, and it makes the slowest point slower. In most corners that's where the time goes, and the lower apex speed carries down the straight after it.
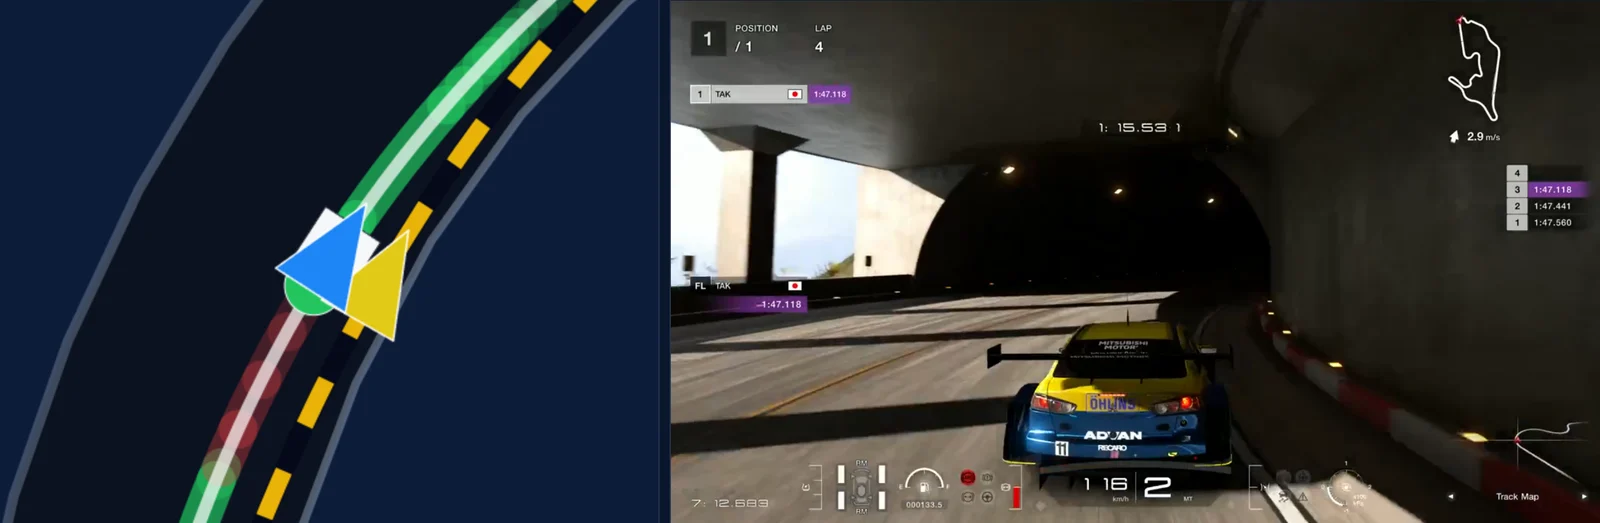
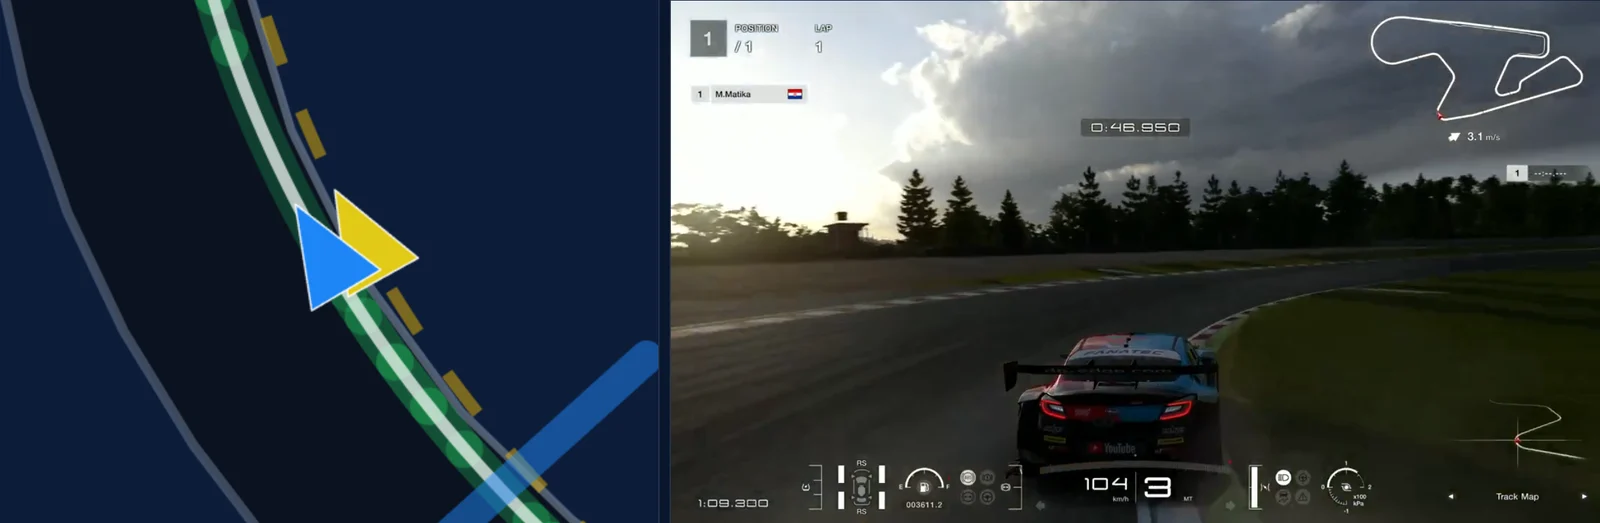
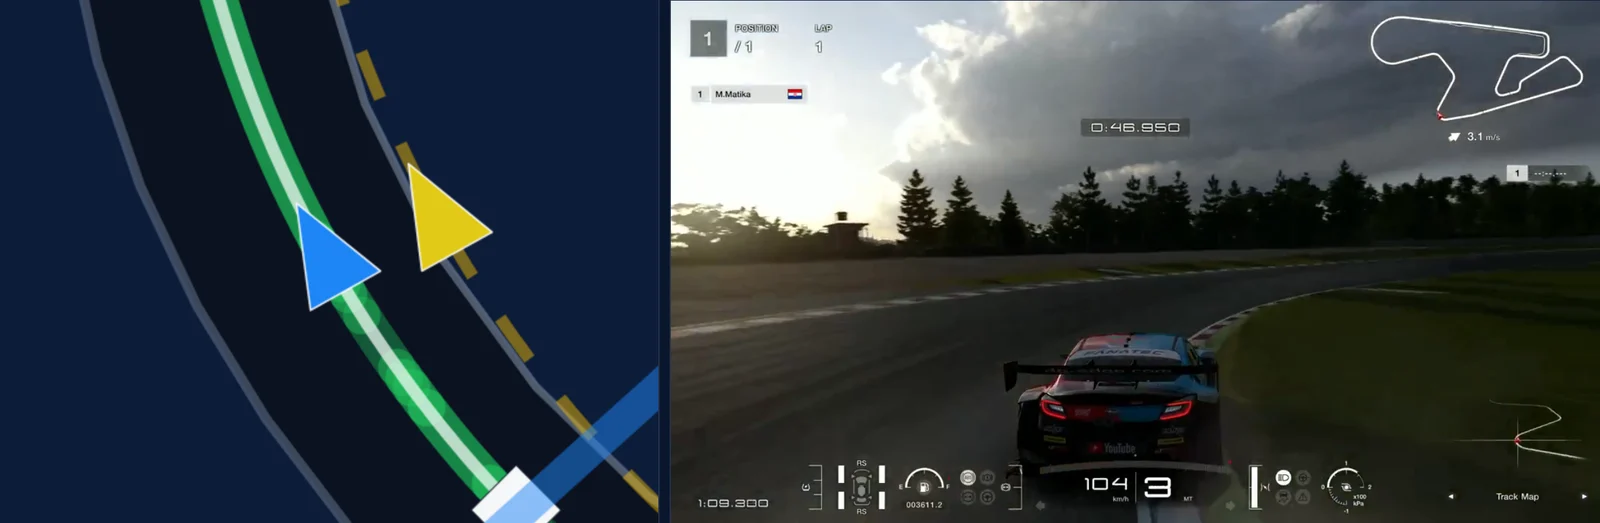
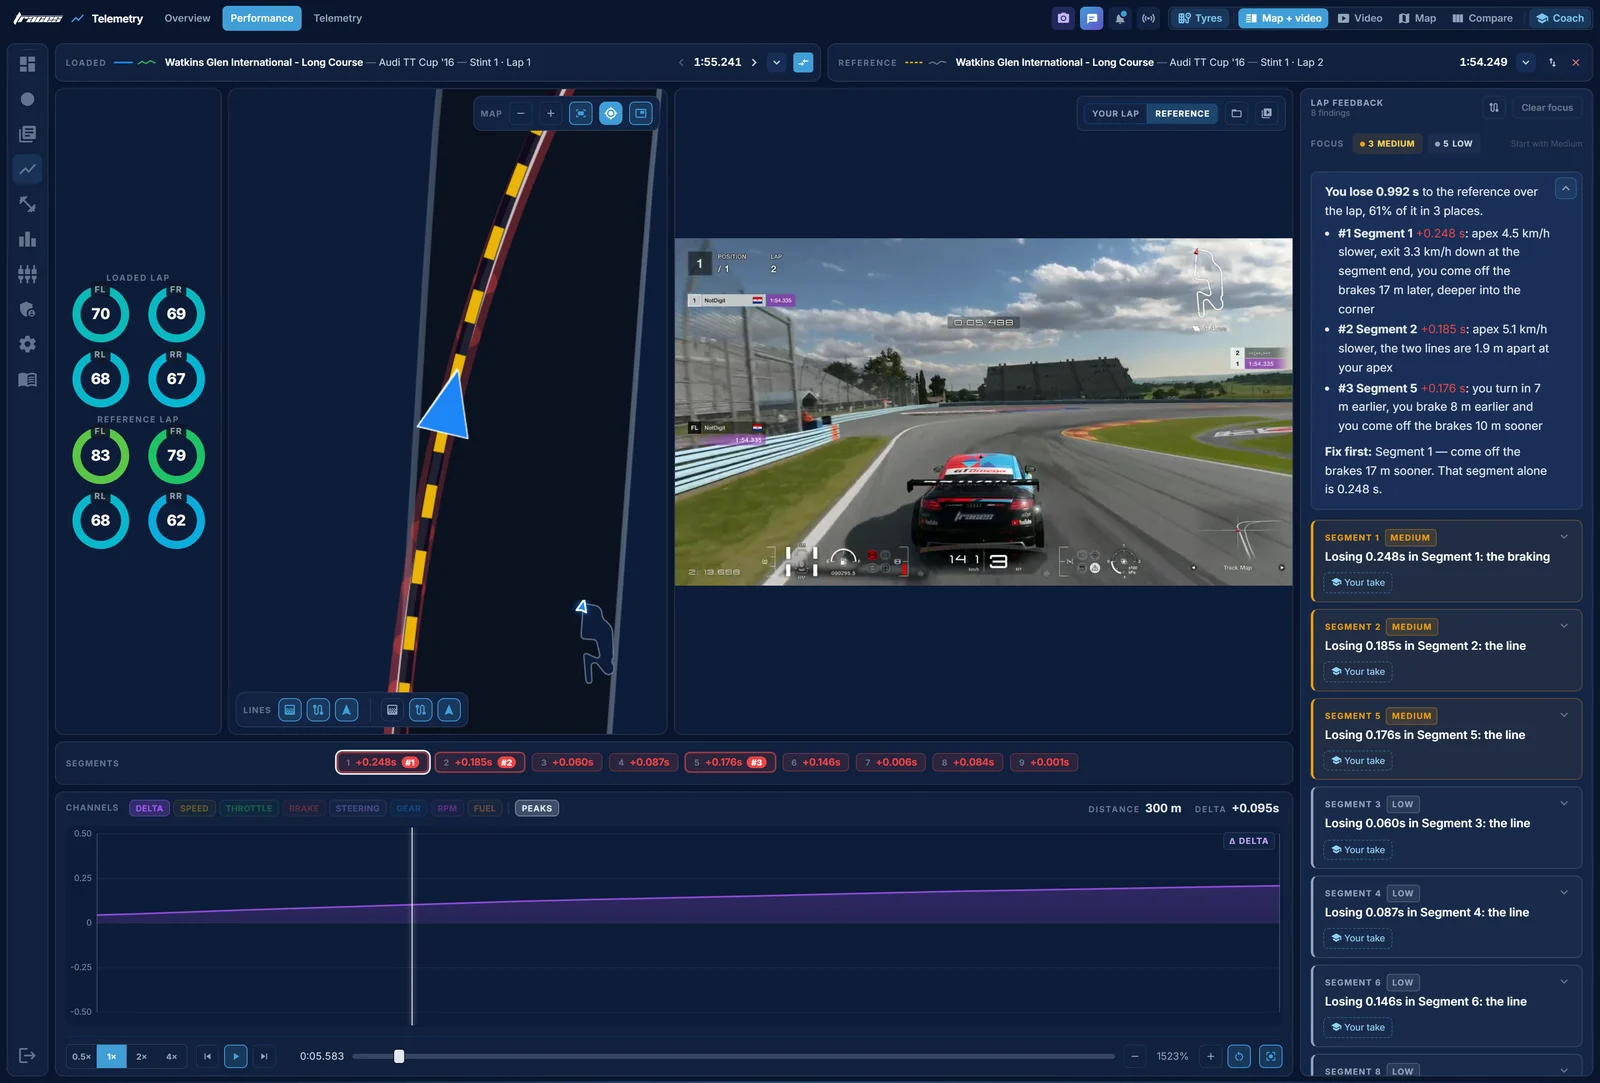
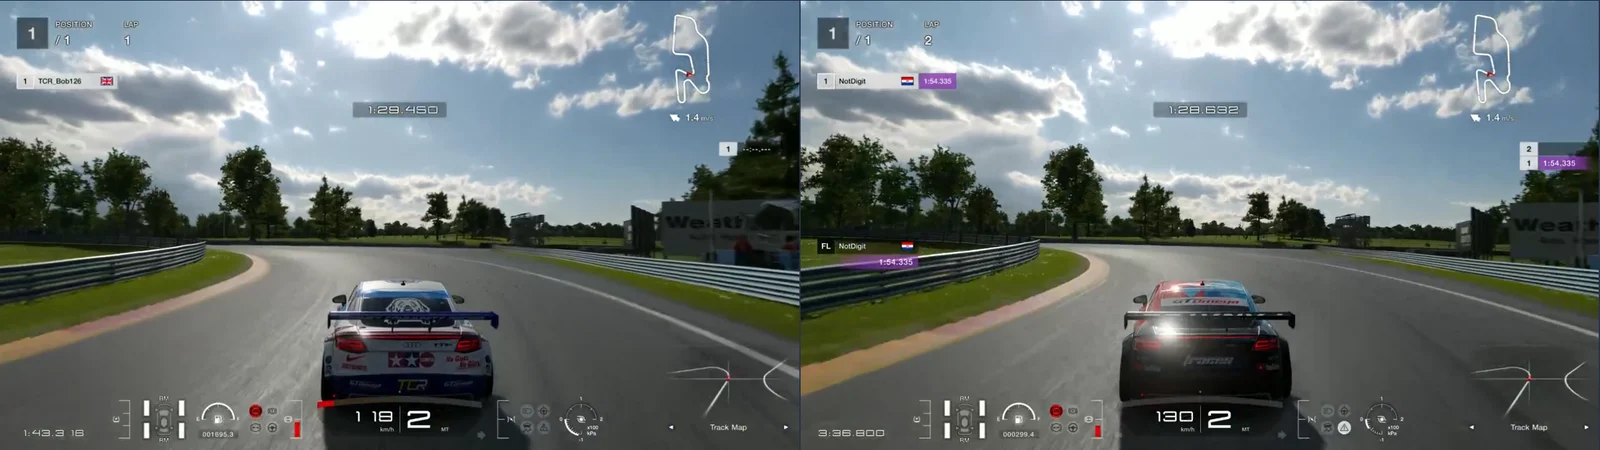
Each corner below has three pictures. The first is the Performance page with the map zoomed in on the corner and Digit's video at the same metre. The second puts Bob's replay and Digit's side by side at the same point on the track. The third is the Telemetry page zoomed to the corner. The short spikes in the throttle traces during braking are the blips on the downshifts, on both laps.
Turn 1: the right-hander after the line 0.206 s
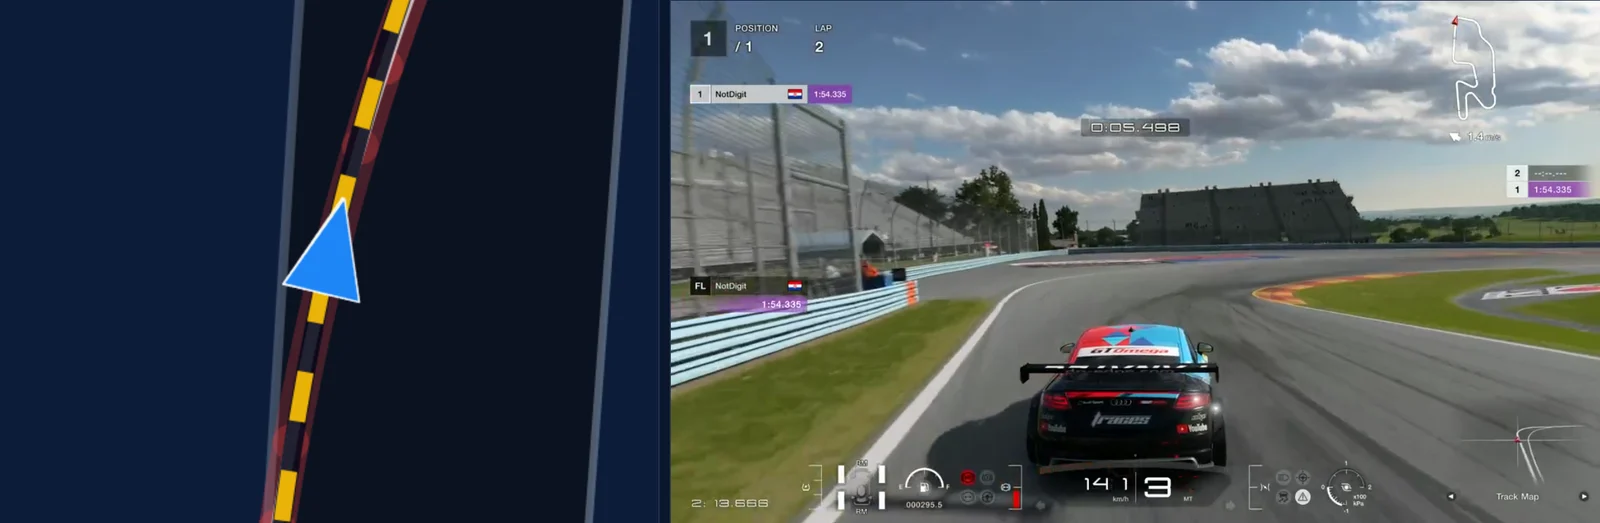
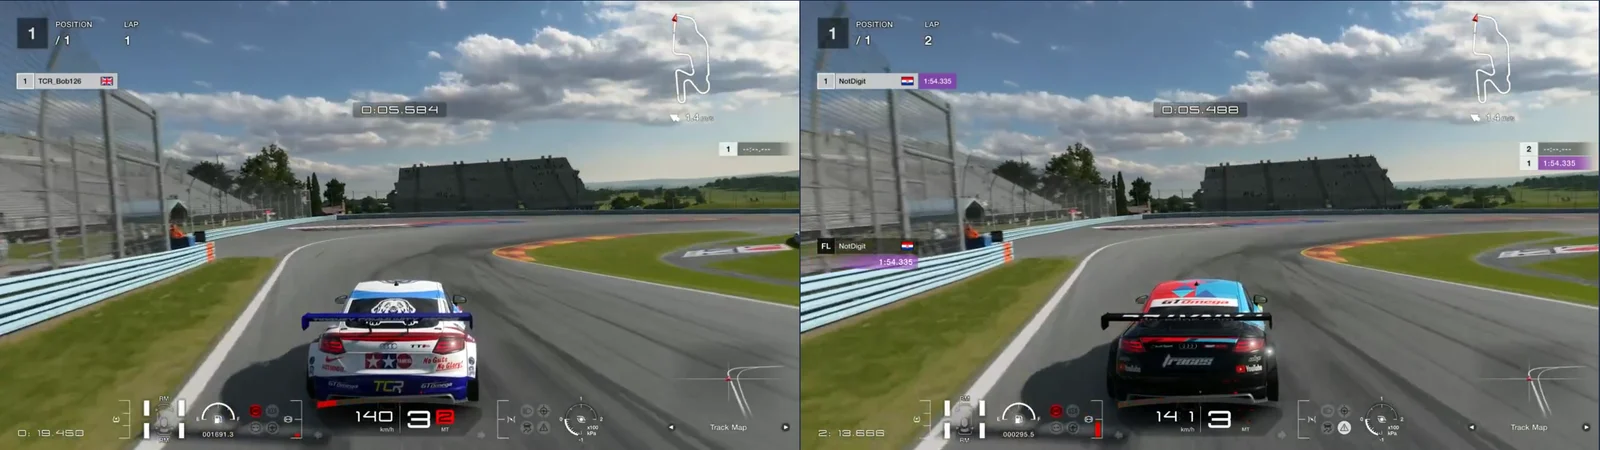
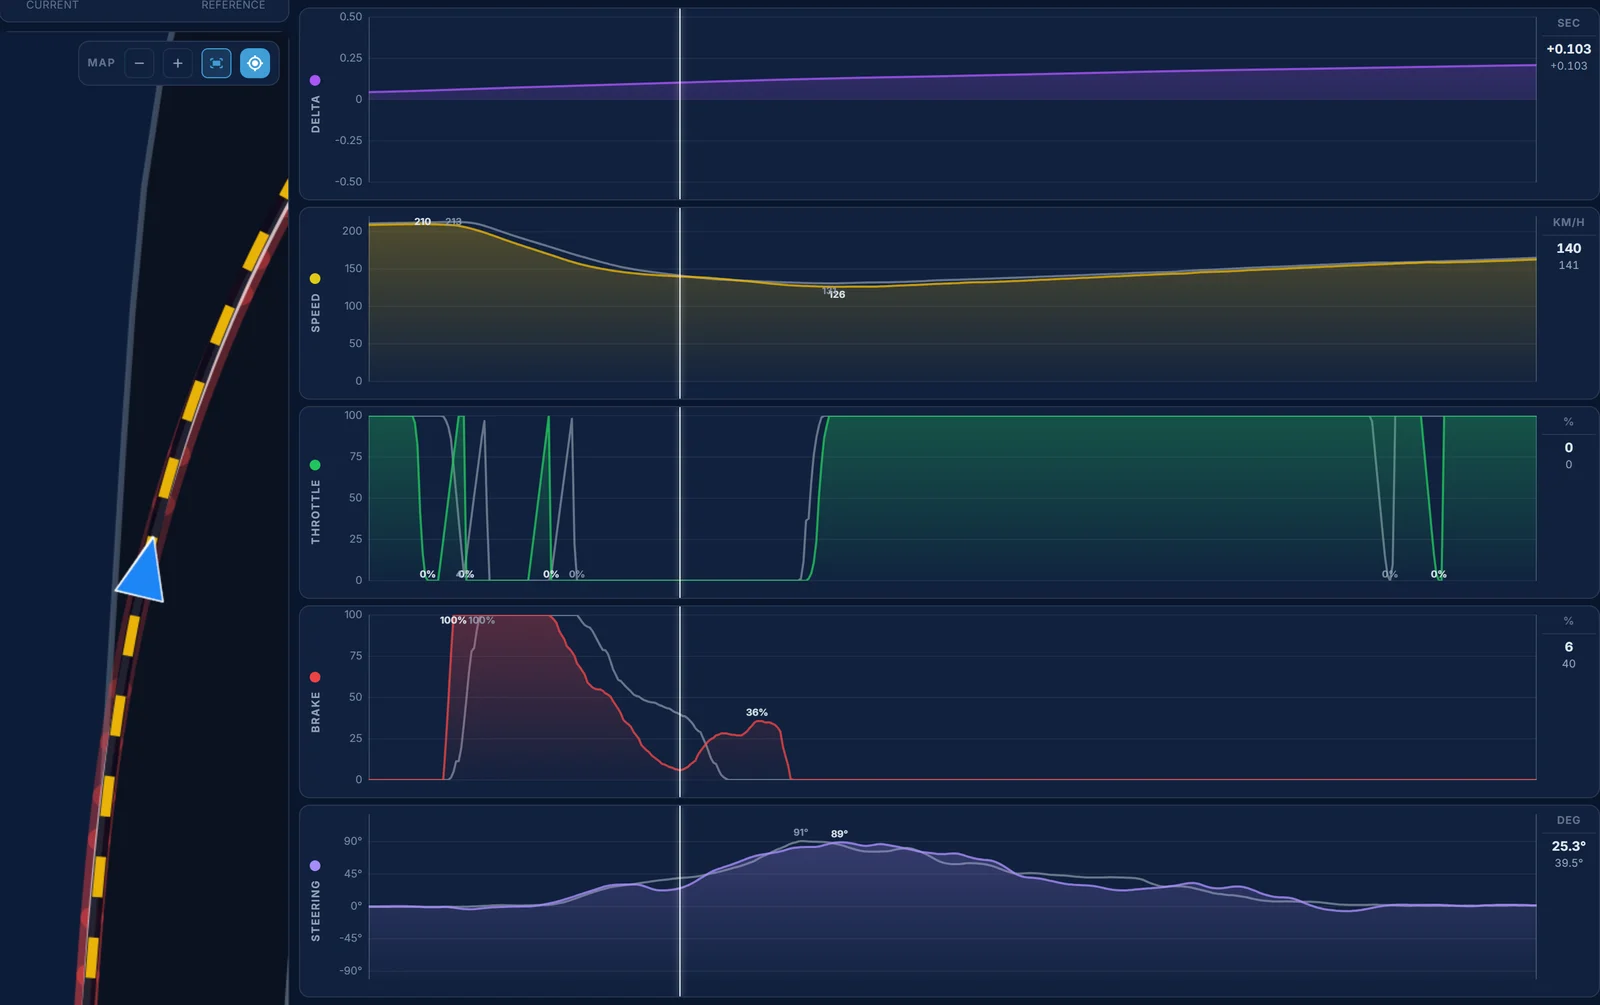
Bob crosses the line at 194.8 against Digit's 197.5 km/h, which is already 0.043 s by 200 m, from the last corner of the lap before. The brake points are 2 m apart, 229 m against Digit's 231 m, at 209.2 and 213.1 km/h. Bob is at 100% brake at 232 m and Digit at 94% at 241 m, so Bob's speed falls faster: 181.0 against 190.6 km/h at 257 m. Then Bob's brake comes off early, down to 6% at 300 m, and goes back on, up to 36% at 319 m. Digit's comes down from 79% at 280 m to 30% at 304 m and is off at 312 m. Bob's is off at 328 m. Between 232 m and 296 m the stop costs 0.063 s. Bob's slowest point is 126.5 km/h at 338 m, Digit's 131.0 km/h at 336 m, both in third, and both are at full throttle there. That 4.5 km/h lower apex carries all the way up the hill: 186.0 against 187.5 km/h at 700 m, and another 0.127 s between 336 m and 700 m.
What to change: brake at the same point, but come off it once and smoothly, finishing by 312 m, without the second press, and carry the extra speed to the apex.
Turns 2 and 3: the left and the fast right 0.126 s
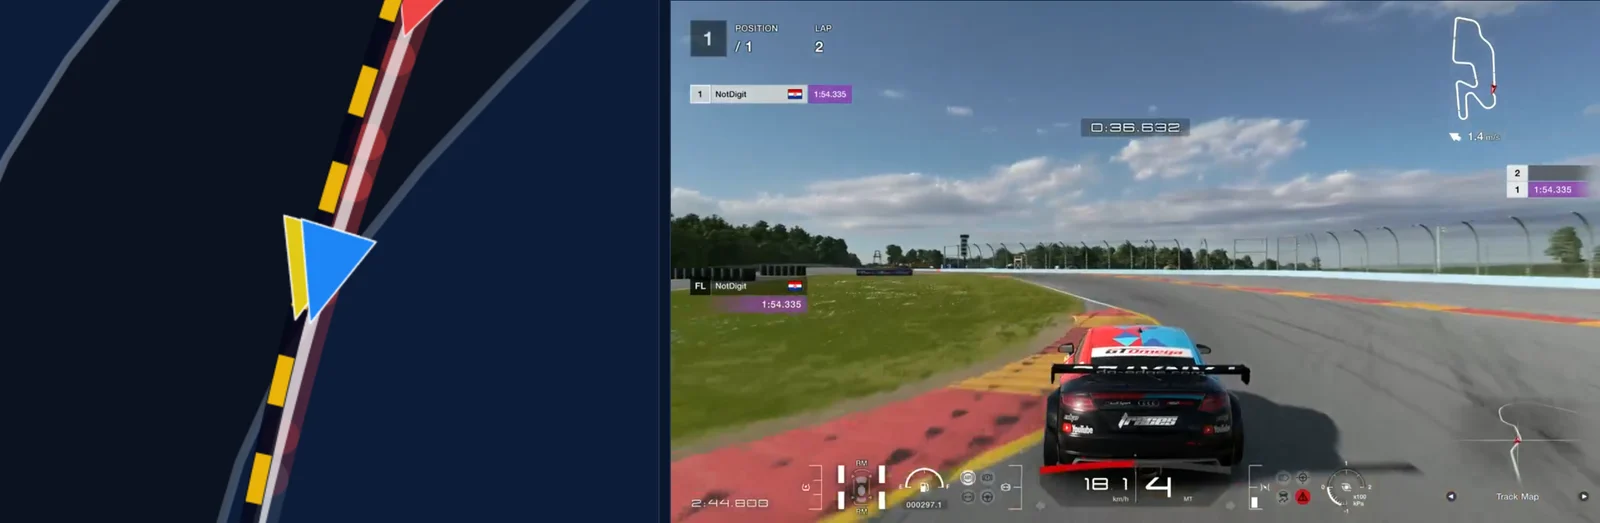
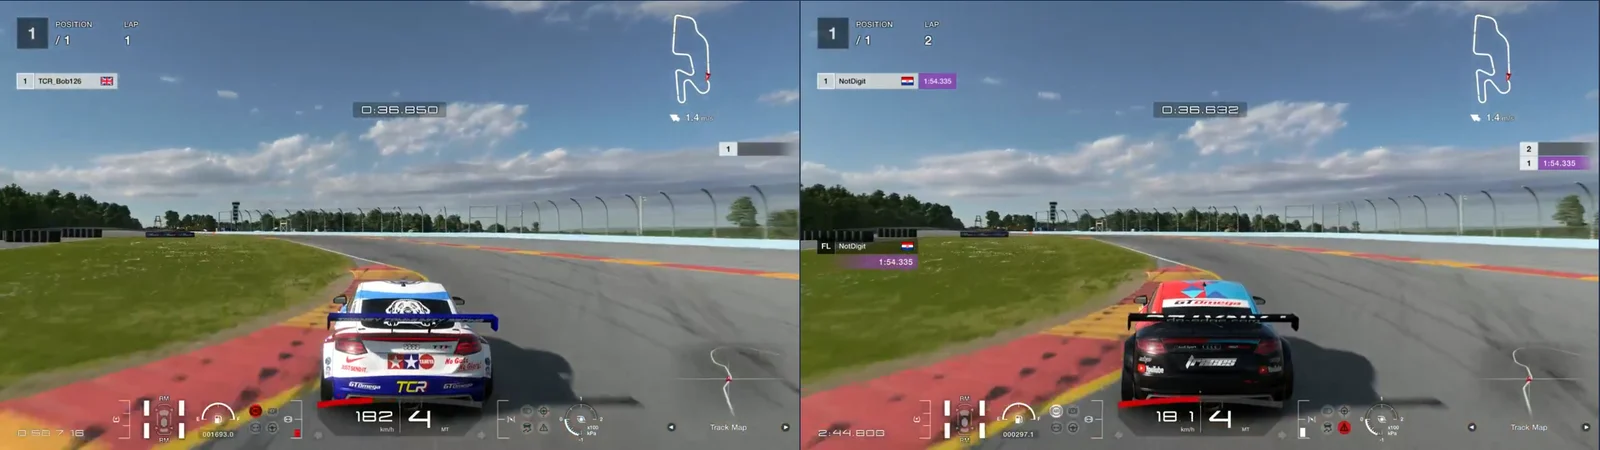
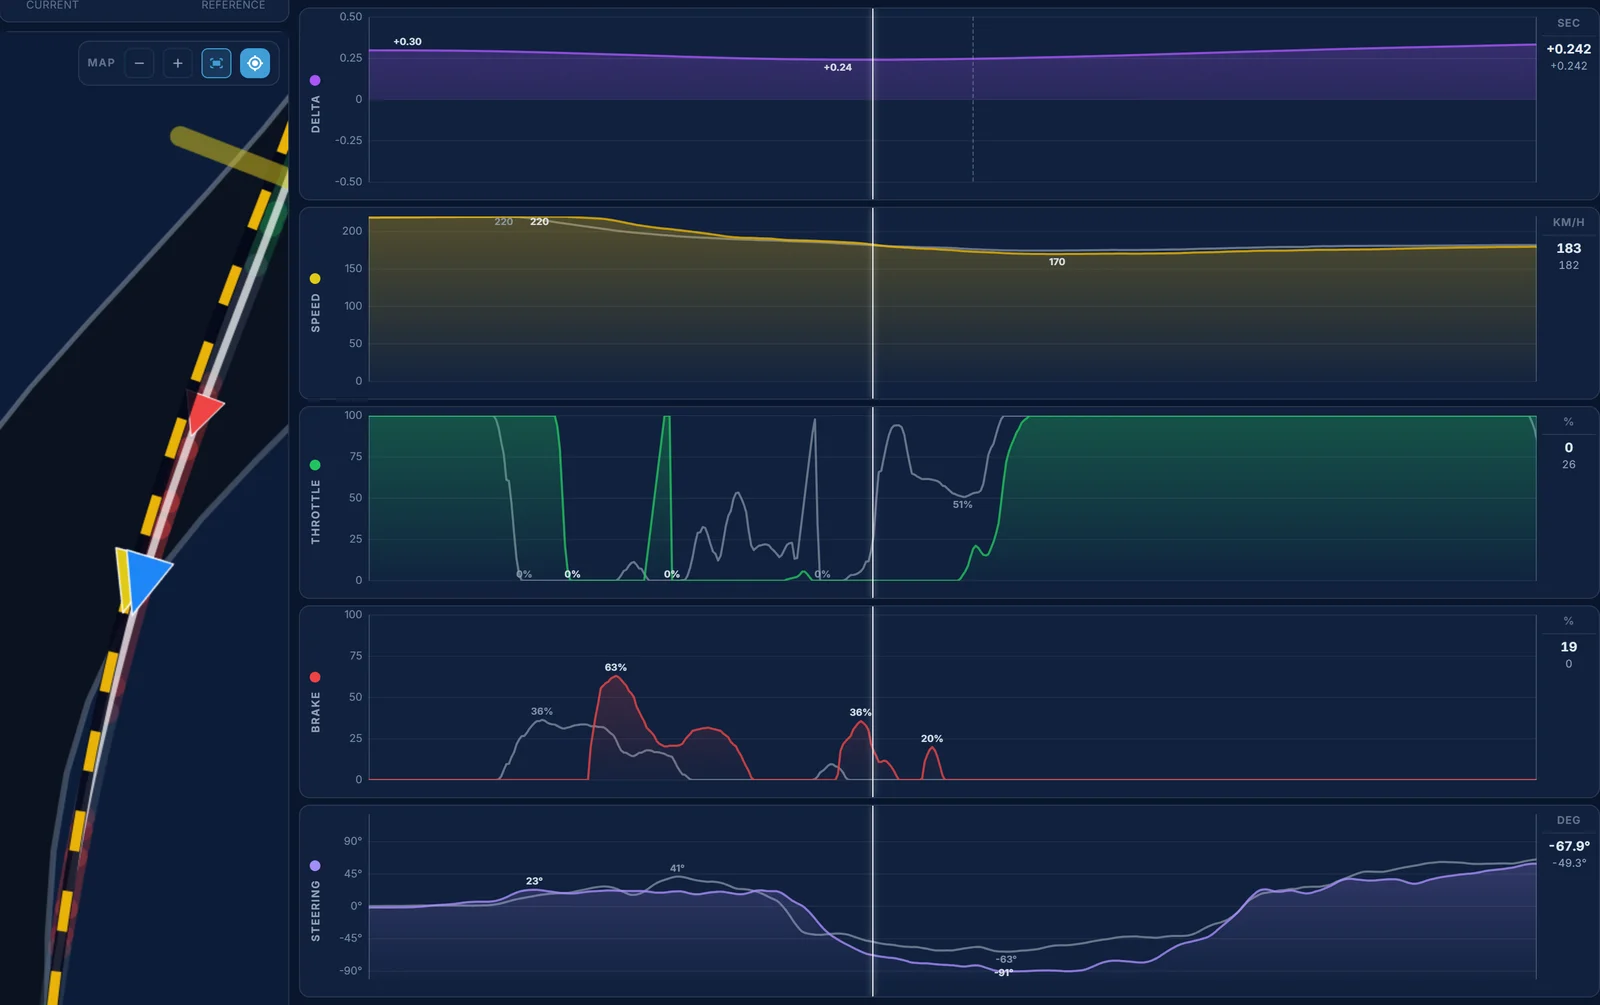
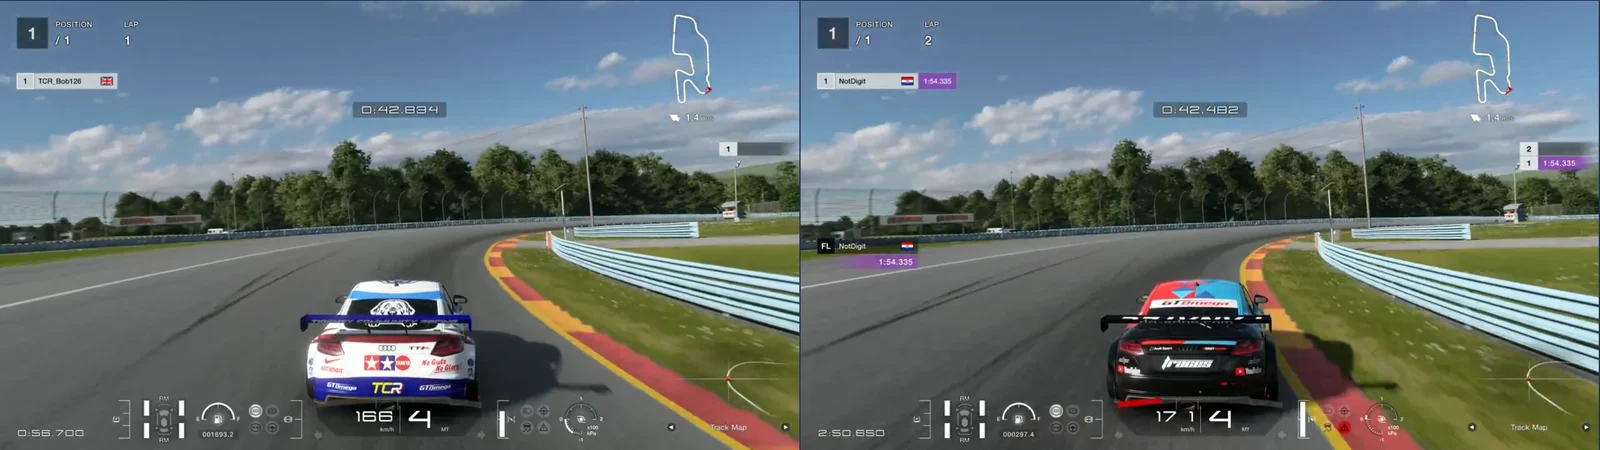
Turn 2 is the one stop where Bob brakes much later than Digit: 1,839 m against 1,802 m, at 218.2 and 220.3 km/h. Digit brakes early and lightly, 36% at most, and is off the brake at 1,878 m. Bob brakes harder, up to 63% at 1,849 m, and between 1,813 m and 1,940 m that actually gains 0.067 s. But Bob's brake comes off at 1,899 m and goes back on, up to 36% at 1,936 m, and apart from the blip on the downshift Bob's throttle stays at 35% or less until 1,980 m, where Digit is already at 94% at 1,949 m. Bob's slowest point is 170.1 km/h at 1,999 m, Digit's 174.7 km/h at 1,996 m, both in fourth, with Bob's line 0.6 m wide at the reference's apex. From 1,940 m to 2,148 m that costs 0.100 s, and Bob reaches turn 3 at 179.8 against Digit's 182.1 km/h.
Turn 3 is a lift for both, no brake. Bob lifts right off, 0% from 2,164 m to 2,180 m, and is at 19% throttle at 2,197 m, where Digit is at 99%. Bob's slowest point is 164.8 km/h at 2,243 m, Digit's 169.9 km/h at 2,282 m, and Bob's line runs 1.9 m wide of Digit's at 2,239 m. From 2,148 m to 2,316 m that's another 0.108 s. On the straight after it Bob is slightly quicker, and by 2,600 m has won back 0.019 s.
What to change: keep the later brake point into turn 2, but come off the brake once and get back to the throttle by 1,949 m, where the reference is at 94%. In turn 3, lift only partly, and keep the car on the reference's line.
Turn 4: the third-gear left 0.106 s
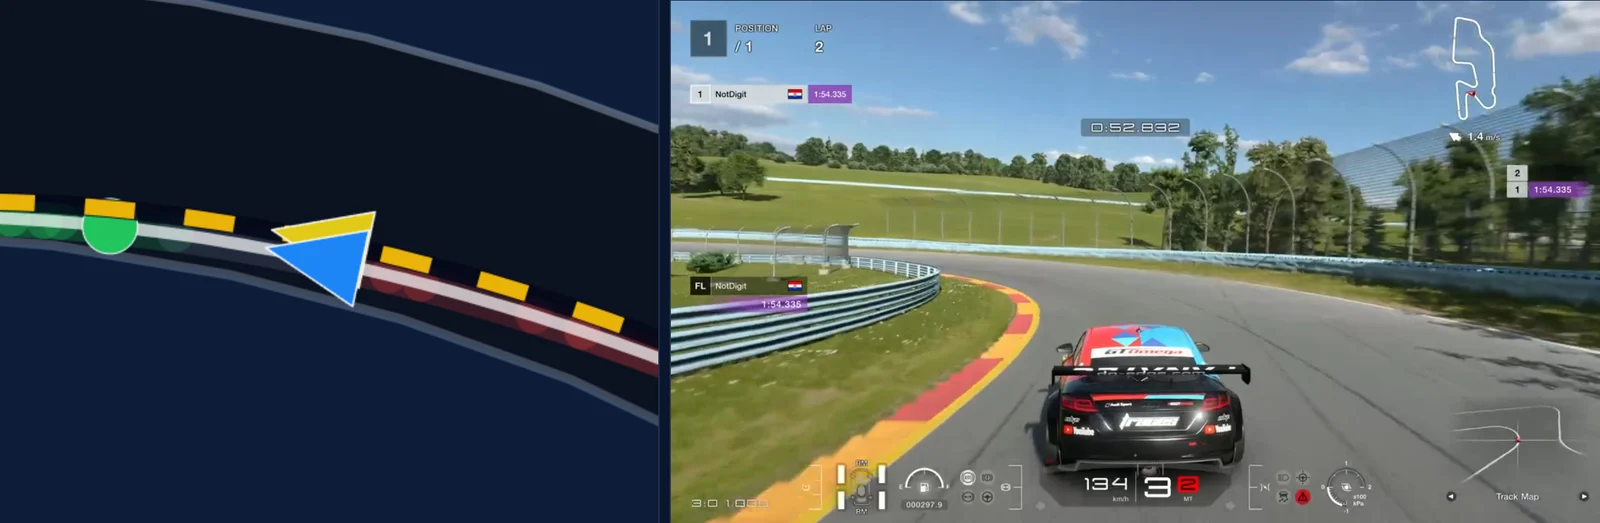
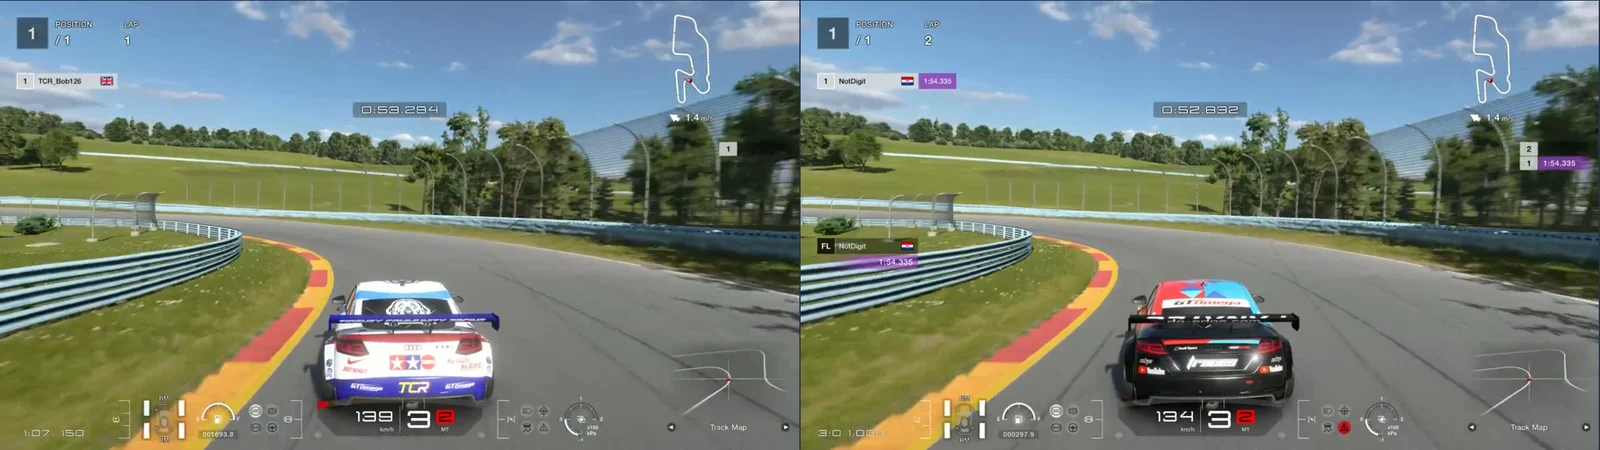
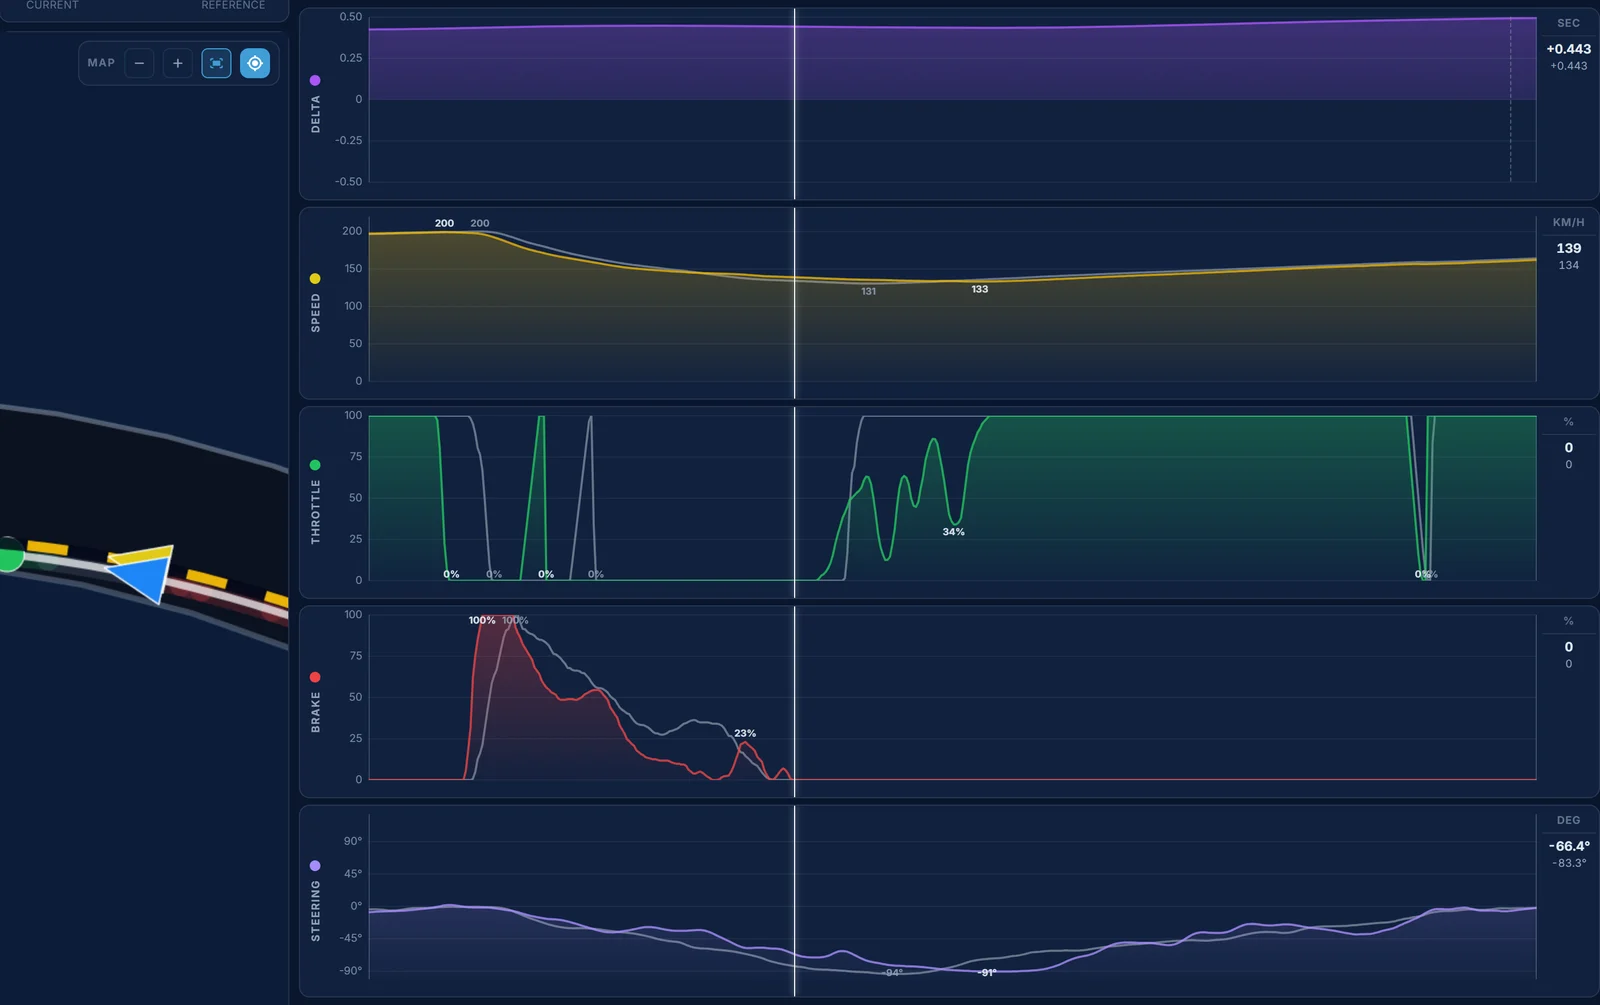
The brake points are 3 m apart, 2,638 m against Digit's 2,641 m, at 198.5 and 200.1 km/h. Bob is at 100% at 2,648 m, where Digit is at 64%, and at 2,657 m Bob is at 182.2 against 191.2 km/h. From 2,641 m to 2,712 m that costs 0.050 s. Bob's brake is off at 2,717 m and back on at 23% at 2,727 m, Digit's is off at 2,734 m. But here Bob carries more speed through the middle: 139.1 against 134.2 km/h at 2,740 m, and Bob's slowest point is 133.4 km/h at 2,789 m against Digit's 130.7 km/h at 2,760 m. Between 2,712 m and 2,776 m Bob wins back 0.061 s. Then Digit is at full throttle at 2,760 m, and Bob holds between 33 and 83% until full throttle at 2,792 m. By 2,848 m Bob is at 144.8 against 148.0 km/h, and from 2,776 m to 3,100 m that costs 0.117 s.
What to change: keep the speed carried through the middle, and finish the turn earlier, so the throttle can be full by 2,760 m instead of feeding in until 2,792 m.
Turn 5: the right-hander at 3,254 m 0.103 s
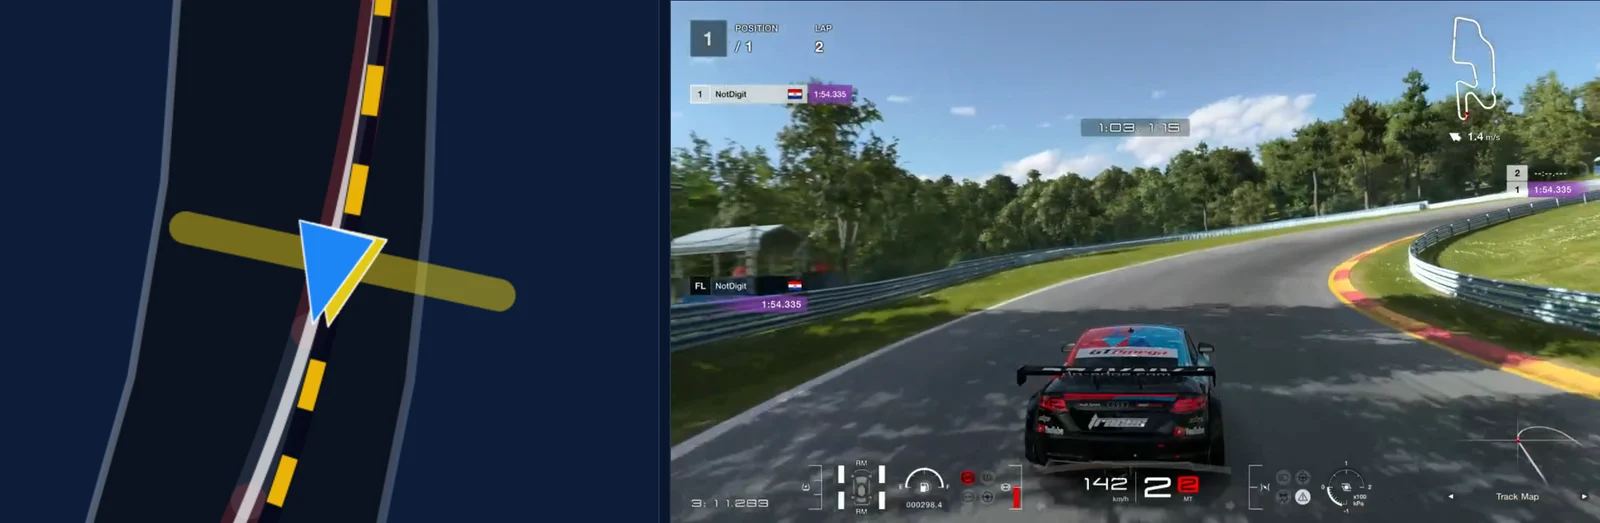
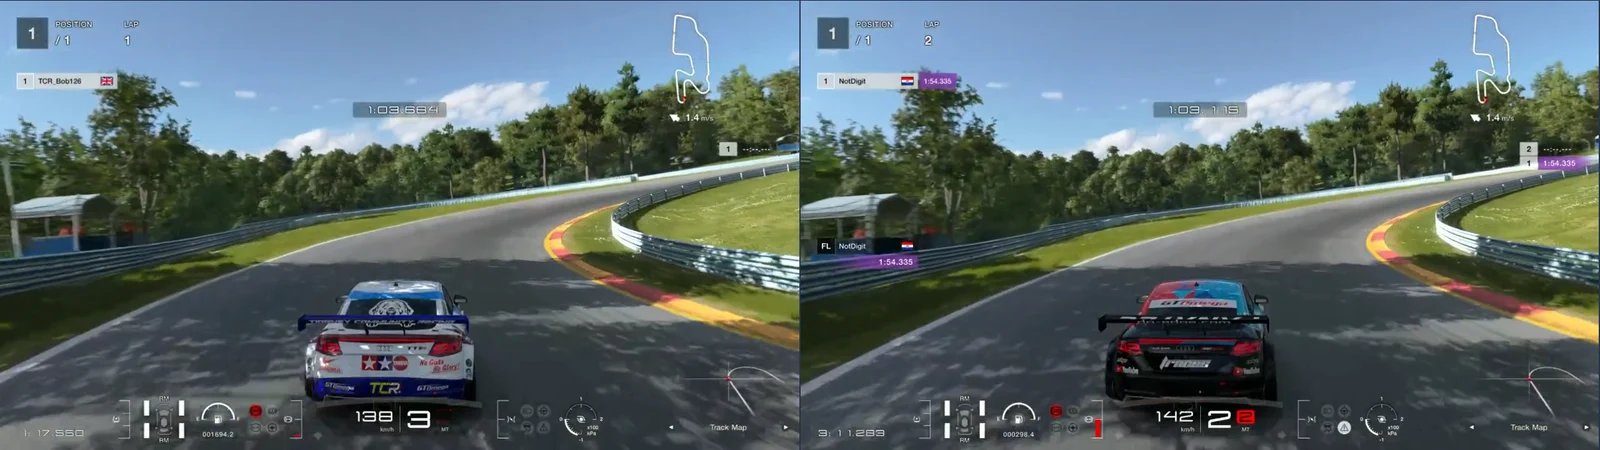
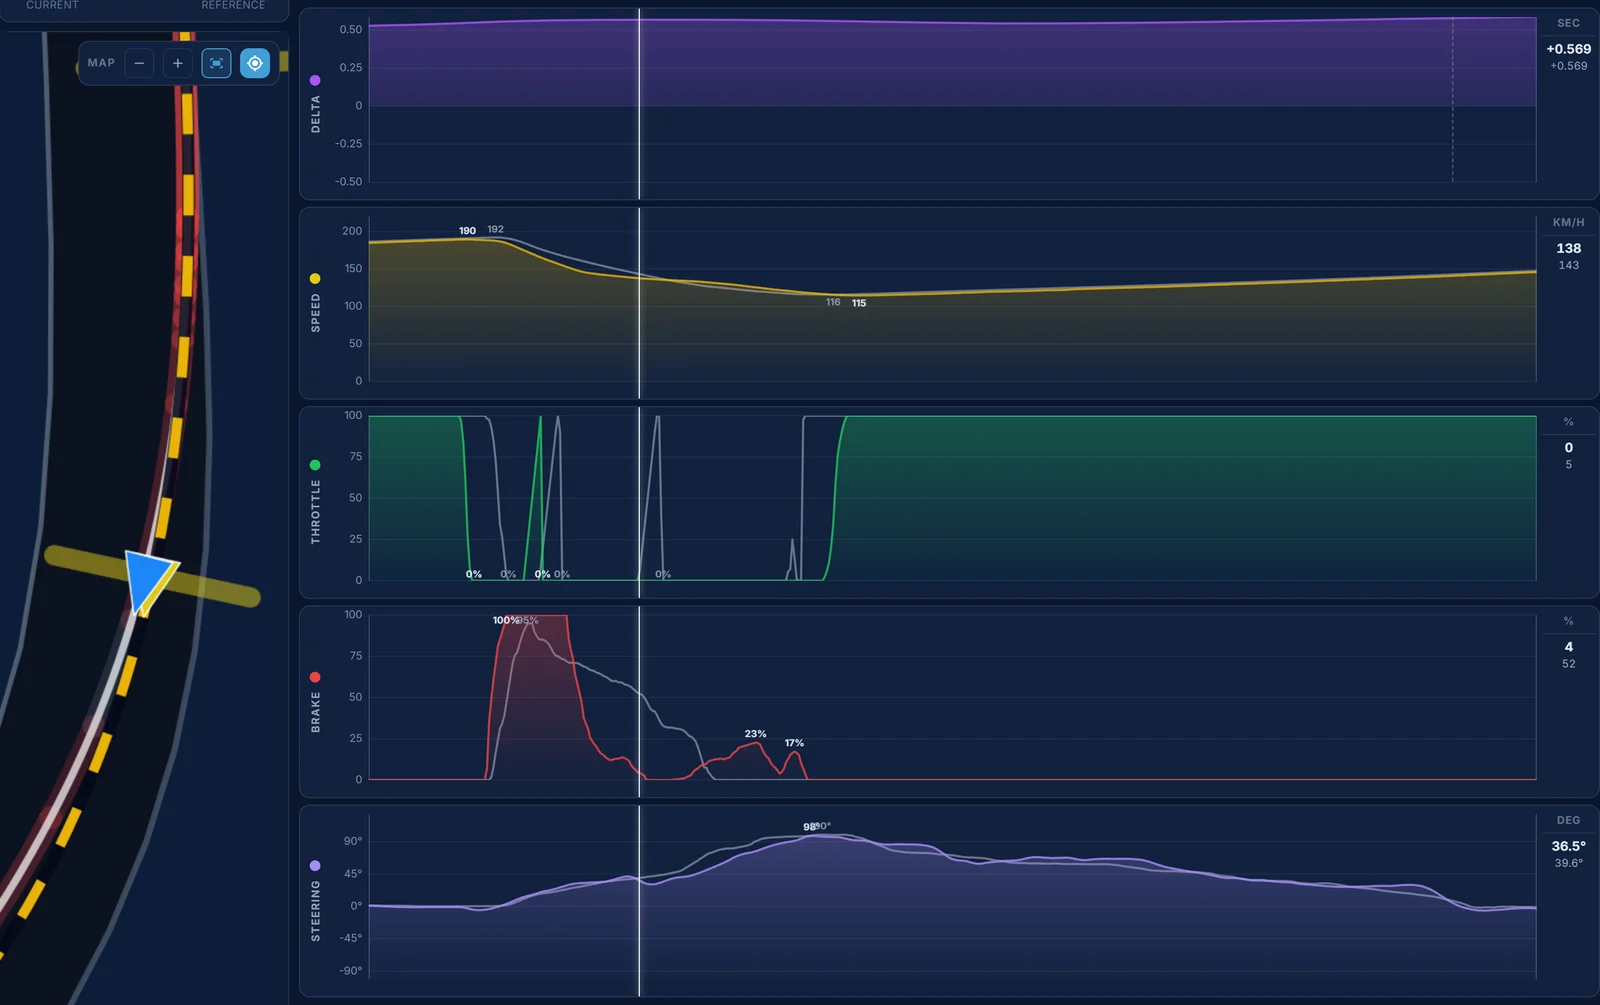
The brake points are 2 m apart, 3,148 m against Digit's 3,150 m, at 188.6 and 192.1 km/h. Bob is at 100% from 3,157 m, where Digit is at 51%, and Bob's speed falls faster: 160.3 against 172.4 km/h at 3,173 m. From 3,148 m to 3,204 m that costs 0.075 s. Bob's brake is off at 3,203 m and back on at 23% at 3,234 m. Digit's comes down gradually, 58% at 3,197 m and 31% at 3,212 m, and is off at 3,223 m. Digit changes down to second at 3,200 m and back up at 3,245 m, where Bob stays in third. Through the middle Bob is faster, 132.2 against 126.8 km/h at 3,221 m, and by 3,260 m has won the 0.075 s back. Bob's slowest point is 114.8 km/h at 3,261 m, Digit's 116.0 km/h at 3,254 m, and Bob's line is 1.4 m inside Digit's at the reference's apex. Digit is at full throttle at 3,254 m and Bob at 3,261 m, and from there to 3,800 m the lower speed costs 0.096 s.
What to change: less brake in the first part of the stop, so the second press isn't needed, and a later apex, so the throttle can be full by 3,254 m.
Turn 6: the right-hander at 3,965 m 0.137 s
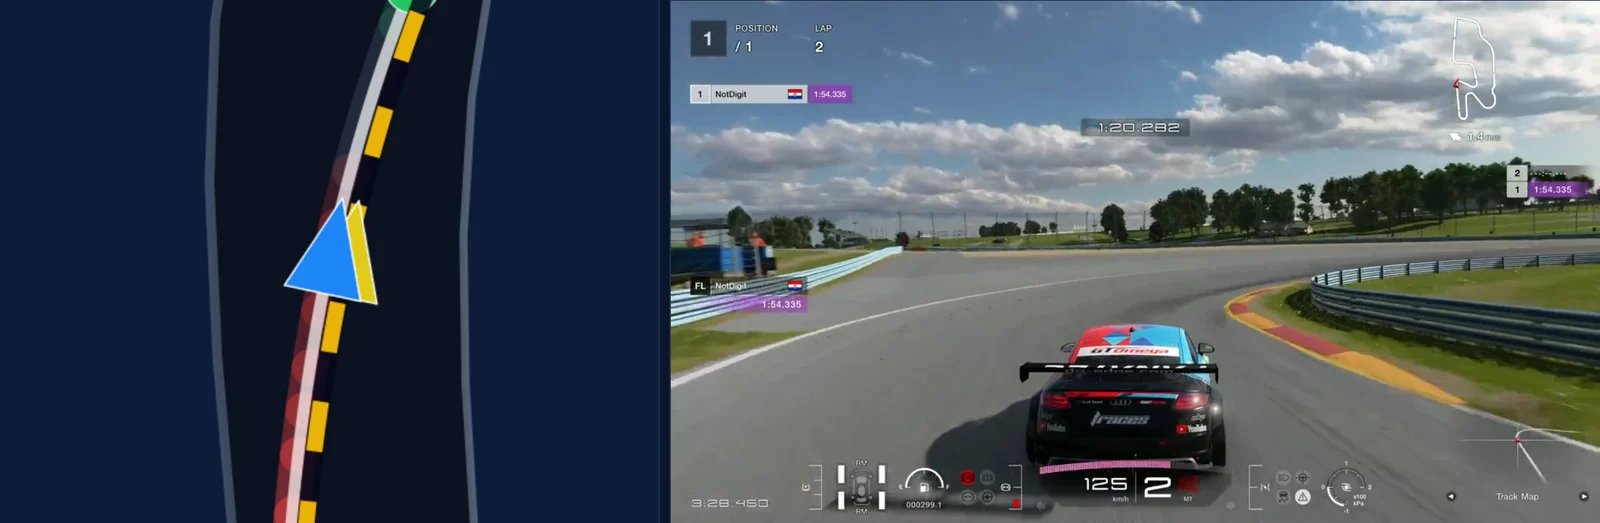
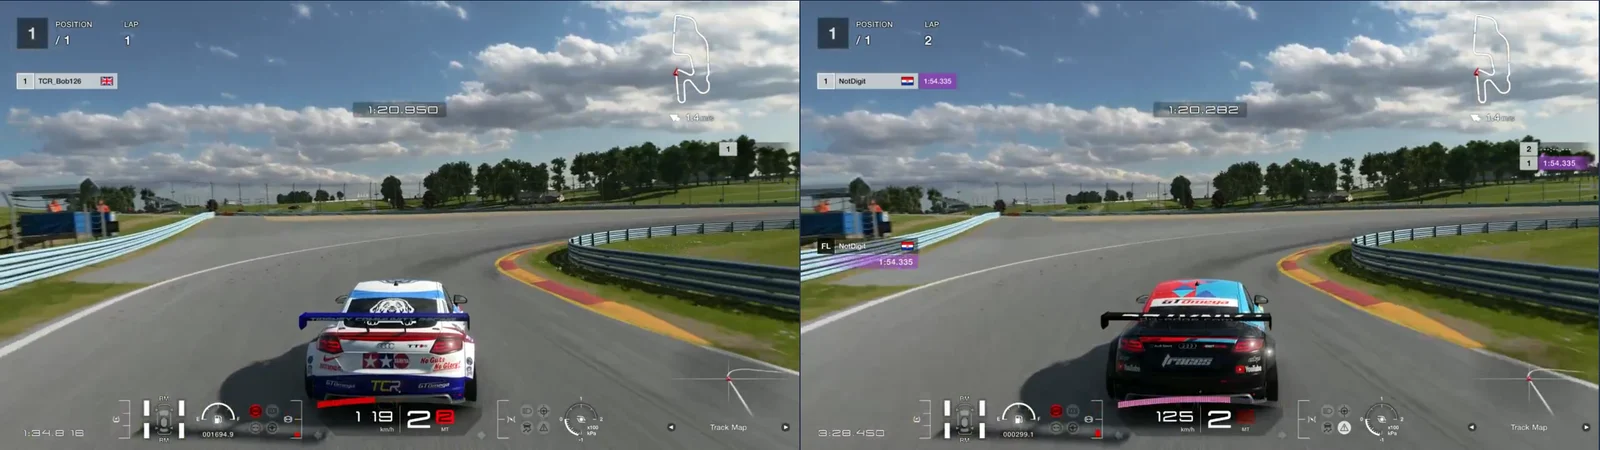
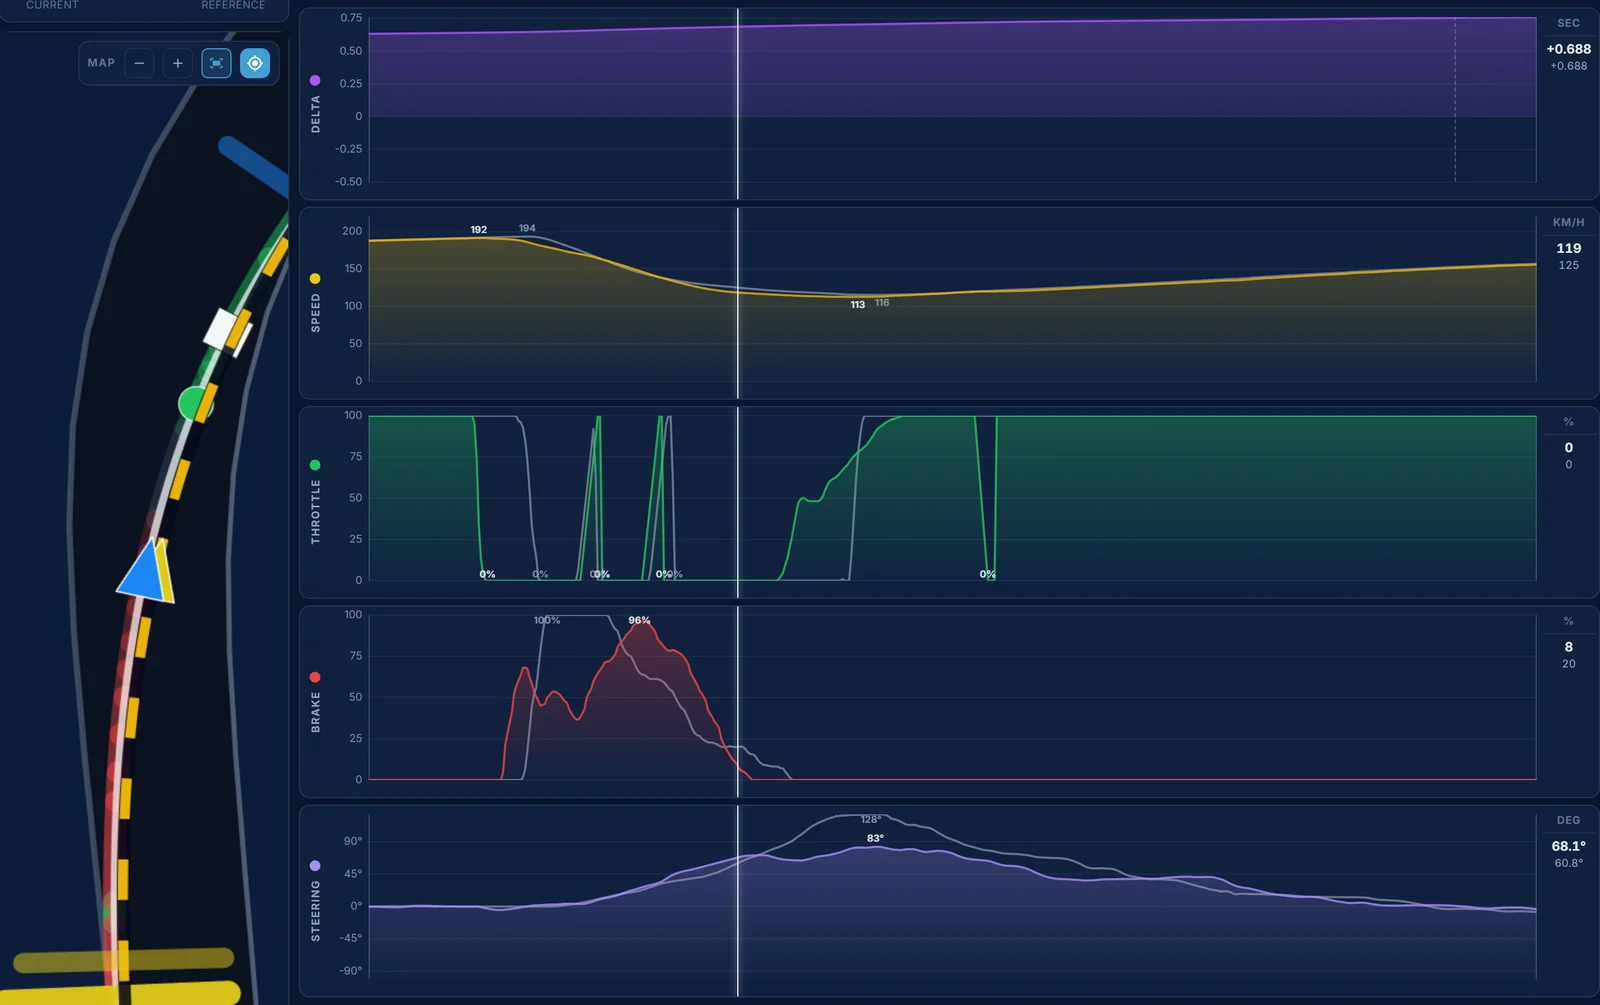
This is the corner where Bob brakes first: 3,854 m against Digit's 3,862 m, at 190.2 and 193.4 km/h. Digit brakes later and harder, 100% from 3,872 m, and by 3,896 m Bob is at 156.8 and Digit at 154.5 km/h. From there Bob keeps more brake, 55% at 3,920 m against Digit's 27%, and Bob's speed falls lower: 118.6 against 125.3 km/h at 3,930 m. Bob's brake is off at 3,934 m, Digit's at 3,943 m. Bob's slowest point is 112.9 km/h at 3,959 m in second, Digit's 115.5 km/h at 3,965 m, just after the change up to third. Bob is on 41 to 81% throttle from 3,944 m and at full throttle at 3,969 m, and Digit at 3,960 m. From 3,920 m to 3,960 m that costs 0.058 s, and the lower exit adds 0.046 s by 4,200 m. The lines are within 0.2 m at the reference's apex. This is the Coach's Segment 5, where it says the driver brakes 8 m earlier and turns in 7 m earlier.
What to change: brake 8 m later, at the reference's 3,862 m, and ease off sooner in the second half of the stop, to get closer to its 115.5 km/h at the apex.
Turn 7: the left-hander at 4,290 m 0.137 s
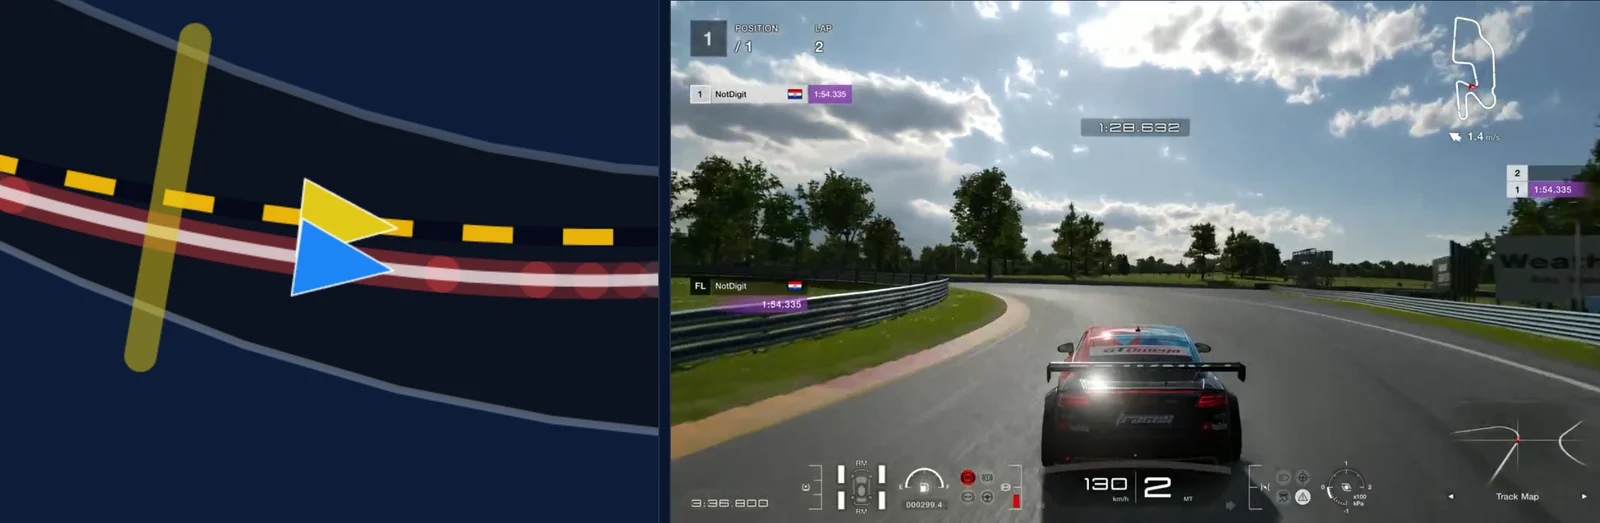
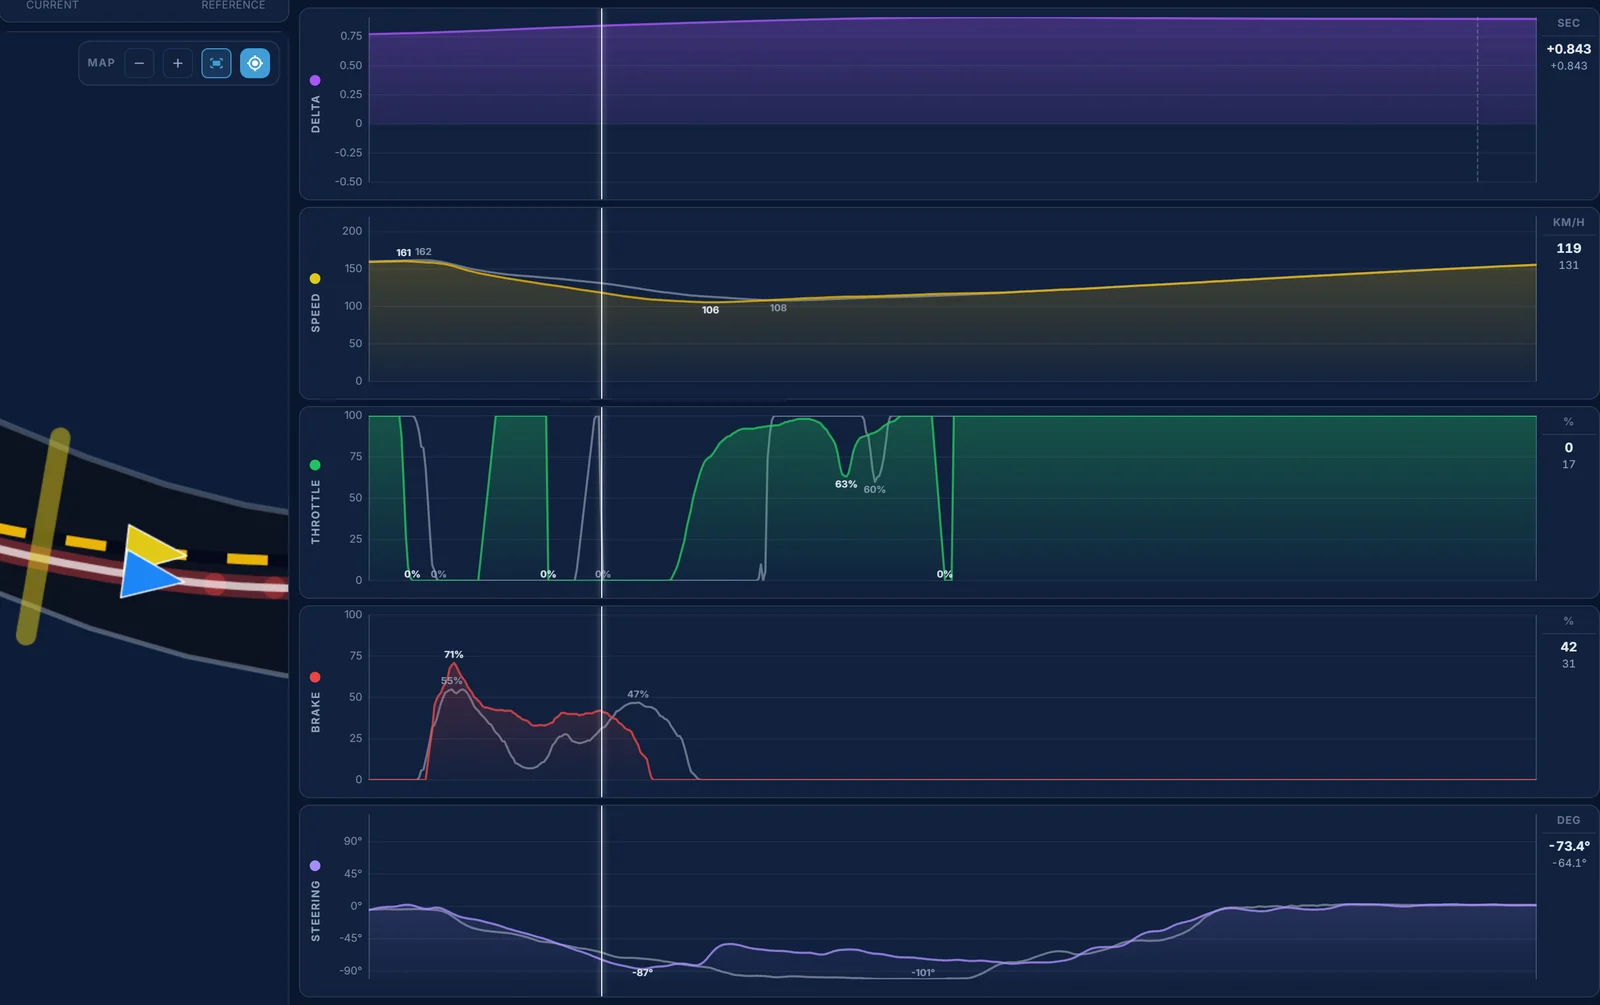
The brake points are 3 m apart, 4,200 m against Digit's 4,197 m, at 158.9 and 161.9 km/h. Bob presses harder, 70% against 55% at 4,208 m, and changes down to second at 4,216 m, where Digit stays in third until 4,244 m. Bob's brake stays between 31 and 48% from 4,216 m to 4,257 m, and the speed falls well below Digit's: 126.2 against 136.5 km/h at 4,240 m, 113.2 against 126.6 at 4,257 m, with Bob's line 1.7 m wide of Digit's at 4,259 m. Bob's slowest point is 105.7 km/h at 4,275 m in second, Digit's 108.2 km/h at 4,290 m in third. From 4,200 m to 4,288 m that costs 0.180 s, the most of any stop on the lap. Bob is back on the throttle first, but it goes between 60 and 98% and down to 77% at 4,304 m, and full throttle comes at 4,319 m, where Digit's is at 4,290 m. Between 4,288 m and 4,440 m Bob wins back 0.047 s.
What to change: less brake on the way in, and change down to second later, where the reference does at 4,244 m, so the car is still near its speed at 4,257 m. Then turn in to a later apex, at 4,290 m, and go to full throttle once.
Turn 8 to the line 0.083 s
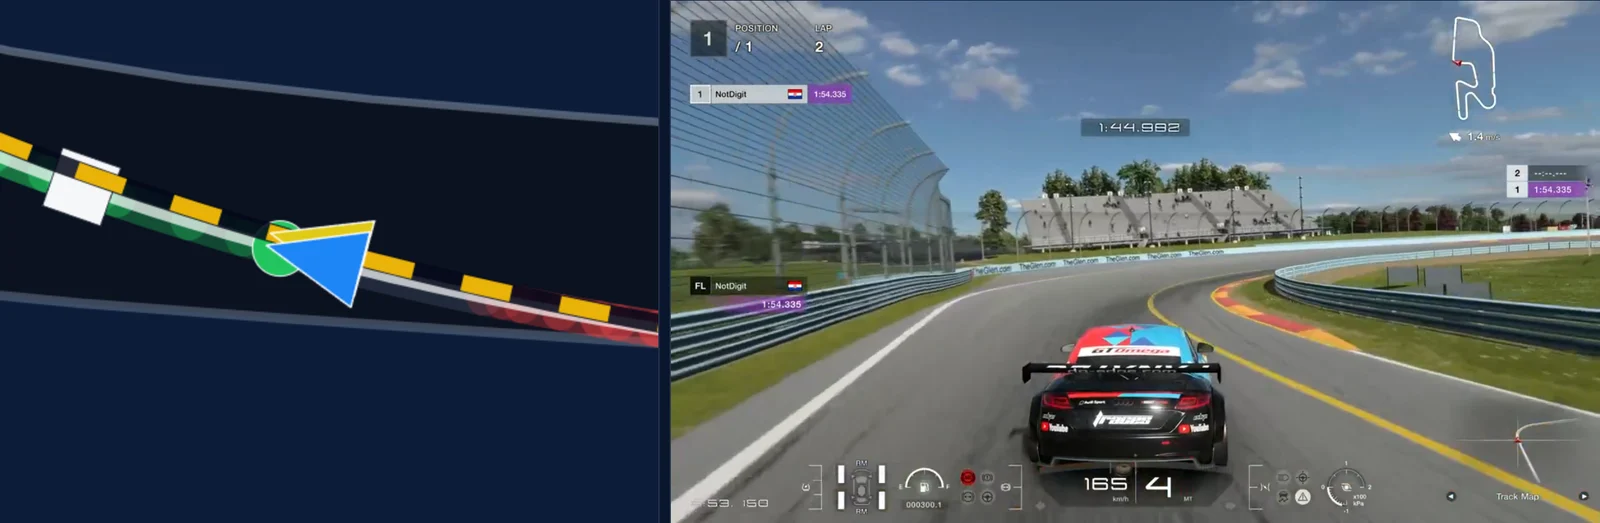
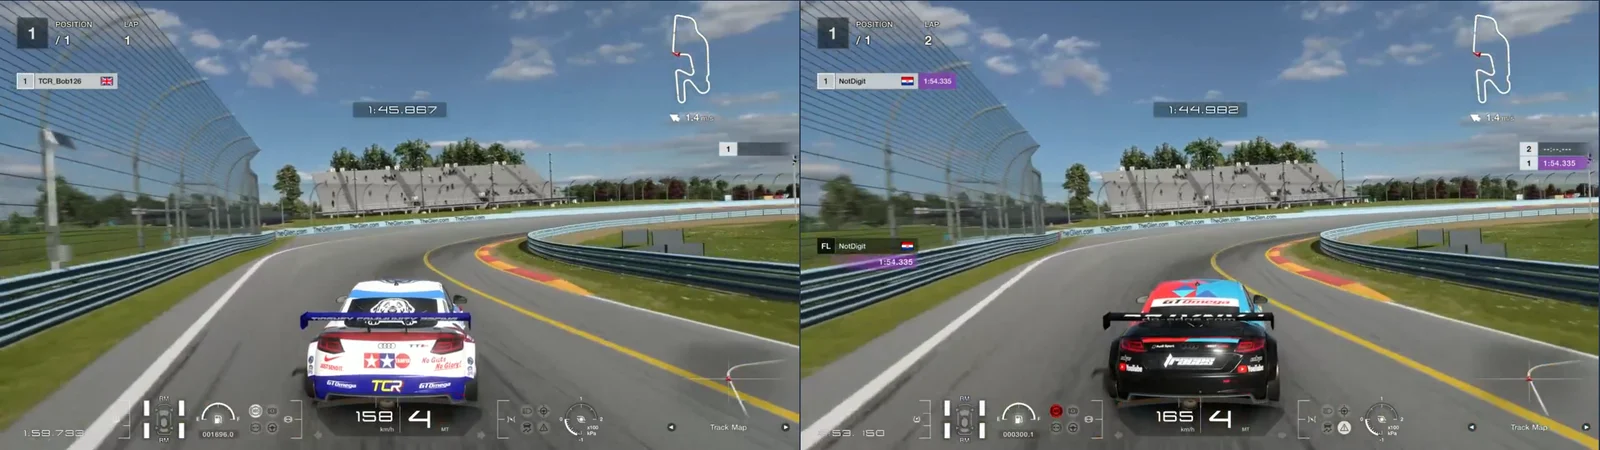
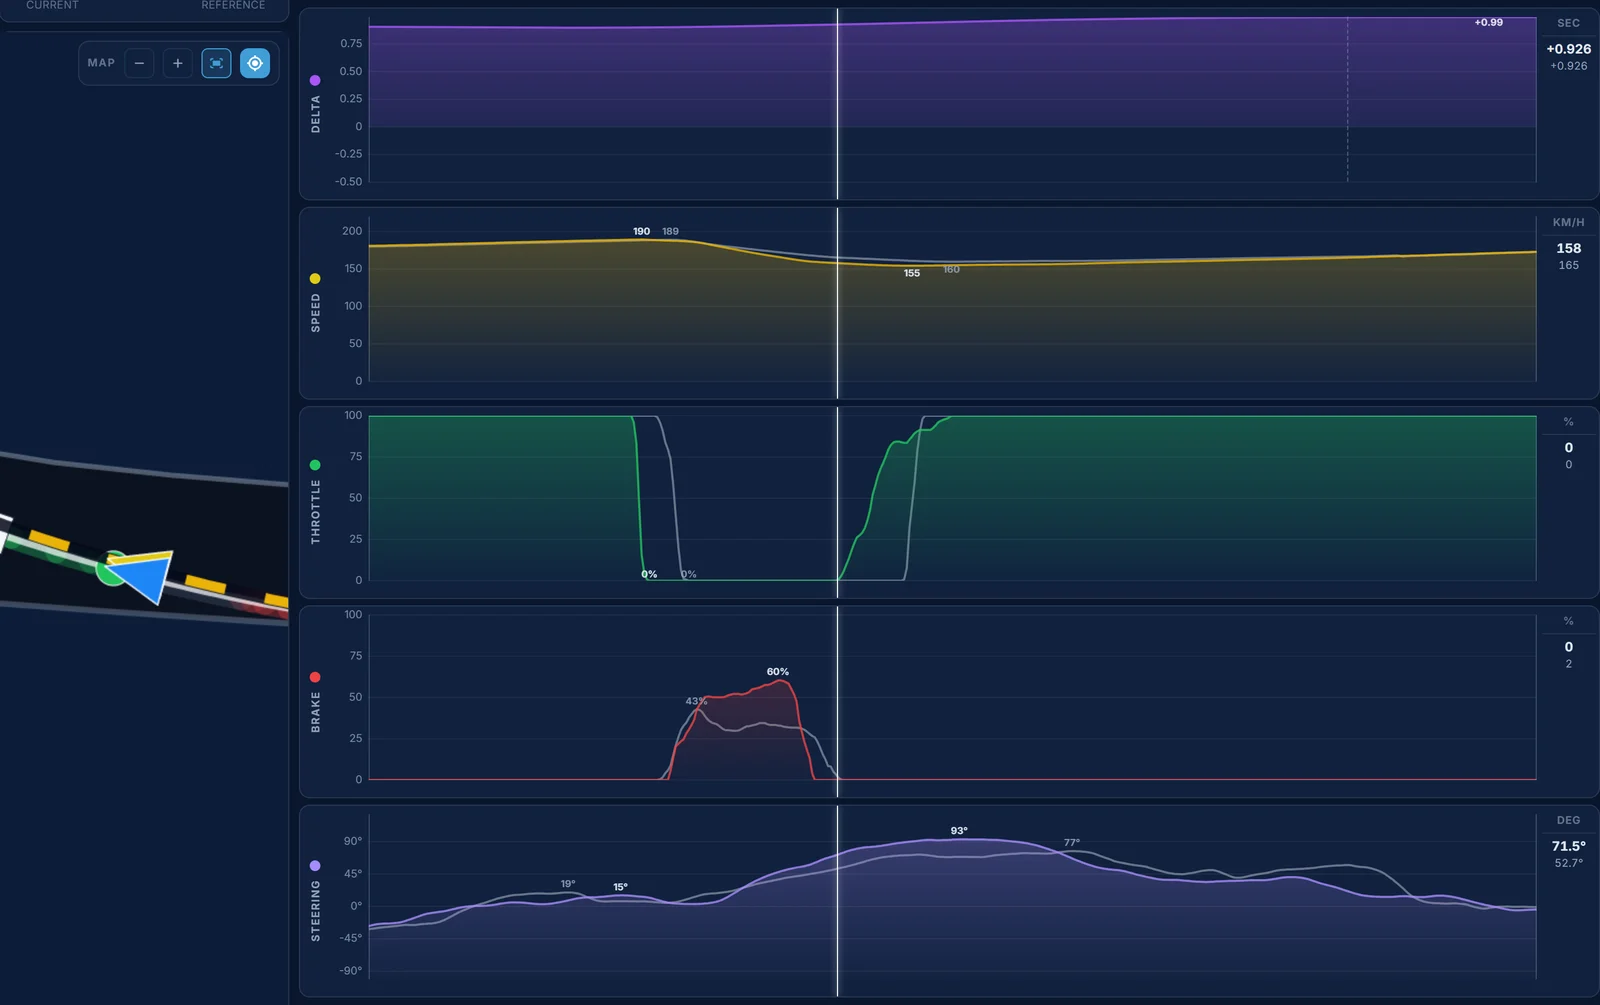
The brake points are 3 m apart, 4,899 m against Digit's 4,896 m, at 188.0 and 189.0 km/h. Bob brakes harder, between 51 and 58% from 4,912 m to 4,936 m, where Digit is between 30 and 36%, and Bob's speed falls further: 164.1 against 171.0 km/h at 4,936 m. Bob's brake is off at 4,944 m, Digit's at 4,951 m. Bob's slowest point is 154.5 km/h at 4,971 m, Digit's 159.9 km/h at 4,982 m, both in fourth, and both are at full throttle there, Bob at 4,981 m and Digit at 4,982 m. Bob's line is 0.4 m wide of Digit's at the reference's apex. From 4,912 m to 5,049 m that costs 0.095 s, and Bob crosses the line at 197.0 against 198.4 km/h.
What to change: same brake point, but with pressure closer to the reference's 30 to 36%, to be nearer its 159.9 km/h at the apex.
What to practise
One focus for the next session: one smooth brake per corner, with less pressure in the first part of the stop. Start with turn 1, as the Coach says: brake at the same point, ease off in one go so the brake is at zero by 312 m, and don't press it again. Then take the same idea to turns 2, 4 and 5, where the brake also comes off and goes back on, and to turns 7 and 8, where Bob presses harder than needed.
Judge it in Traces after each run, not by feel. Open the lap against the reference in the Telemetry page and look at the brake trace in each corner: right now Bob's has two humps in turns 1, 2, 4 and 5, where Digit's has one. When it has one smooth slope down, the speed at the apex comes up, and the time with it.
Off the track, the Drills in Traces train it with just the pedals. Brake Release is the one for this lap: it builds coming off the brake smoothly in one go, which is exactly what the second press breaks. Throttle Hold helps with the part throttle after the apex in turns 4 and 7.
What is already good
Bob's brake points are as good as anyone's: 229 against Digit's 231 m into turn 1, 2,638 against 2,641 m into turn 4, 3,148 against 3,150 m into turn 5, 4,200 against 4,197 m into turn 7 and 4,899 against 4,896 m into turn 8. Into turn 2 Bob brakes 37 m later than Digit, and it gains 0.067 s on the way in. Bob carries more speed than Digit through the middle of turns 4 and 5, 139.1 against 134.2 km/h at 2,740 m and 132.2 against 126.8 km/h at 3,221 m. And Bob is at full throttle within 2 m of Digit in turns 1 and 8. The commitment is there. What's left is how the brake is used once it's on.
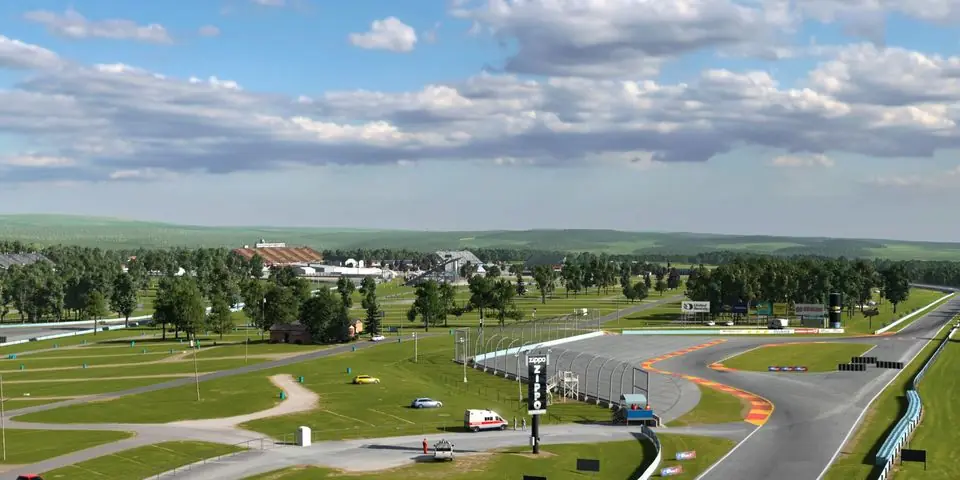
Measured in Traces: TCR_Bob126's 1:55.241 (lap 1 of the session posted in the forum, recorded live) against Digit's 1:54.249 (lap 2 of "Monday PB", recorded live), Watkins Glen International, Long Course, Audi TT Cup '16, Daily Race C, Week 45/2026. Both laps driven live, so the brake points and releases are the brake trace itself. Times lost per corner are the gap between the two laps at the corner's start and end; the Coach's segment times are its own.